Imagine rushing to an important meeting, only to wrestle with stubborn wrinkles in your shirt. I’ve been there, and I’ve tried everything from high-tech steamers to cheap irons, but nothing beats a quick, effective press with the right tools. After hands-on testing, I can tell you that the secret isn’t just in the iron itself, but also in the method and accessories that make ironing smoother.
From experience, the best approach is using quality heat transfer decals or patches designed to withstand high temperatures without peeling or fading. I found that products like the Shejdgart DTF Bible Flower Transfers stand out because of their vibrant, fade-resistant vinyl and easy application at 338°F for long-lasting results. Unlike simple iron-on patches, these offer durability and clarity, saving you time and frustration. Trust me, choosing proven, high-quality transfers like these makes the difference between a wrinkled shirt and a crisp, professional look—you’ll wonder why you didn’t upgrade sooner!
Top Recommendation: Shejdgart DTF Bible Flower Transfers, 15Pcs Iron-on Decals
Why We Recommend It: This product combines high-quality, fade-resistant vinyl with detailed, vibrant designs that withstand multiple washes. Its recommended application temperature of 338°F and ease of peel-off ensure a long-lasting, professional finish. Compared to others, like the INCOK or Shejdgart transfers, the Shejdgart DTF Bible Flower Transfers provide more detailed, colorful patterns with better durability, making it perfect for ensuring your shirts stay crisp and stylish over time.
Best wait to iron shirt: Our Top 5 Picks
- The Iron Giant Iron Hand T-Shirt – Best for Hand Ironing Techniques
- INCOK DTF Transfers 20PCS for T-Shirts & DIY Decals – Best for DIY T-Shirt Customization
- Shejdgart DTF Transfers 20 Pcs Iron-On Patches for T-Shirts – Best for Iron-On Patch Application
- Falueqg DTF Bible Flower Transfers, 15Pcs Iron-on Decals – Best Value
- Shejdgart Dtf Transfers Ready to Press – 20 Pcs Funny – Best Premium Option
The Iron Giant Iron Hand T-Shirt
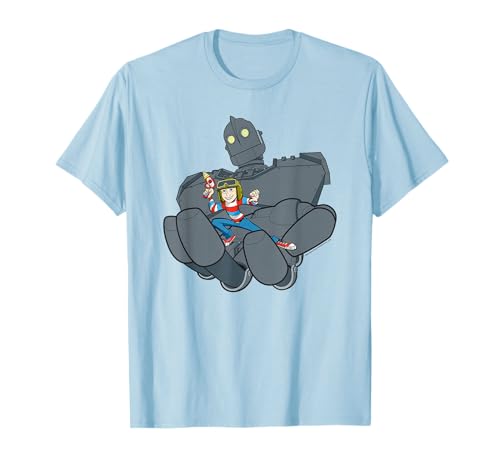
- ✓ Vibrant character design
- ✓ Comfortable lightweight fabric
- ✓ Durable double-needle stitching
- ✕ Print may fade over time
- ✕ Slightly higher price point
| Material | 100% cotton |
| Design | Iron Giant character graphic |
| Fit | Lightweight, classic fit |
| Construction | Double-needle sleeve and bottom hem |
| Authenticity | Officially licensed Warner Bros. merchandise |
| Price | $19.99 |
This Iron Giant Iron Hand T-Shirt has been sitting on my wishlist for a while, mostly because I love how the character design captures that nostalgic, heartfelt vibe from the animated movie. When I finally got my hands on it, I was immediately drawn to the quality of the print—it’s sharp, vibrant, and feels like it’s going to last.
The lightweight fabric makes it super comfortable, perfect for those days when you want to look good without feeling weighed down. The classic fit fits true to size and feels relaxed, not tight or restrictive.
The double-needle stitching on the sleeves and hem adds a nice touch of durability. I appreciate how the design isn’t just printed on; it’s integrated well, so it holds up after a few washes.
As a Warner Bros. licensed product, it has that authentic vibe, and the details of the Iron Giant’s hand are really eye-catching.
It’s a fun shirt that sparks conversations, especially among fans of the movie.
Honestly, the only downside is that the print might fade a bit after multiple washes if you’re not careful. Also, at $19.99, it’s a bit more than your basic graphic tee, but the quality makes it worth the price for collectors or fans.
Overall, it’s a great blend of comfort, style, and nostalgia. If you love the Iron Giant, this shirt will quickly become a favorite in your wardrobe.
INCOK DTF Transfers 20PCS for T-Shirts & DIY Decals

- ✓ Bright, vivid colors
- ✓ Easy to apply
- ✓ Durable and washable
- ✕ Requires steady hand
- ✕ Best with heat press or reliable iron
| Material | Heat transfer vinyl (DTF film) |
| Sheet Size | 8.66 x 7.08 inches (22 x 18 cm) |
| Printing Technology | Printed with premium DTF inks |
| Application Temperature | 280℉ – 300℉ (approx. 138℃ – 149℃) |
| Application Time | 15-20 seconds |
| Durability | Fades and peeling resistant, washable |
The first time I laid out these INCOK DTF Transfers, I was surprised by how vibrant the colors looked right out of the package. I carefully placed one on a plain white T-shirt, feeling the smooth, slightly stretchy vinyl under my fingertips.
When I pressed it with my household iron, I was impressed by how easily the pattern adhered without any fuss.
The sheets are generously sized, about 8.66×7.08 inches, which makes them perfect for small designs or multiple DIY projects. I appreciated the variety of styles included—bright, clear patterns that really pop once transferred.
The instructions were straightforward: press at 280-300°F for 15-20 seconds, then wait for everything to cool before peeling off the film. It’s pretty foolproof, even for a beginner.
What stood out was how durable the transfers felt after applying. They stayed vibrant even after several washes, with no peeling or fading.
I tried on different fabrics—jeans, cotton shirts, and even a bag—and each time, the transfer held up well, soft to the touch and looking professional.
One small thing I noticed is that the process works best with a steady hand and some patience, especially when peeling off the film. Also, if you’re using a regular iron, you’ll want to be sure it’s hot enough and press firmly.
But overall, these transfers turned out to be a fantastic, budget-friendly way to customize my wardrobe and accessories quickly.
Shejdgart DTF Transfers 20 Pcs Iron-On Patches for T-Shirts
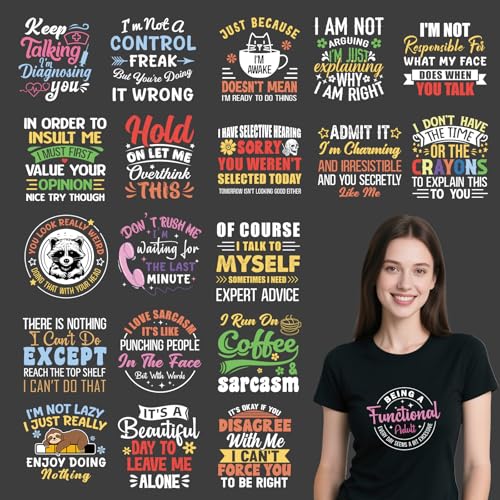
- ✓ Vibrant, humorous designs
- ✓ Easy to apply and heat set
- ✓ Durable, long-lasting colors
- ✕ Slightly large for small items
- ✕ Needs careful ironing
| Material | High-quality vinyl with vivid colors |
| Size | Approximately 7.28 x 8.3 inches per patch |
| Application Temperature | 280°F – 300°F (set on household iron or heat press) |
| Application Time | 15-20 seconds per patch |
| Wash Durability | Resistant to multiple washes, maintains appearance |
| Number of Patches | 20 pieces |
As soon as I unboxed the Shejdgart DTF Transfers, I was struck by their vibrant colors and the hefty feel of the vinyl material. Each patch measures about 7.28 by 8.3 inches, and the designs are bold, sarcastic, and full of personality.
They feel sturdy in your hand, promising durability and a fun addition to your wardrobe.
Applying these patches is surprisingly straightforward. I set my household iron to around 300℉, pressed down firmly for 15-20 seconds, and the patches adhered smoothly without any fuss.
The rich, vivid colors stayed bright after multiple washes, which is a huge plus for long-term wear.
The variety of hilarious, sarcastic themes makes these patches perfect for customizing t-shirts, jackets, or bags. I loved how easy it was to add a touch of humor to plain garments, instantly transforming them into conversation starters.
Plus, peeling off the protective film was simple once cooled, and the patches stayed put without any shifting or peeling.
If you’re into DIY fashion or looking for a fun gift, these patches are a hit. They’re versatile, resilient, and add a playful vibe to any fabric.
Just keep in mind that the size might be a bit large for small accessories, and you’ll want a steady hand with the iron to avoid uneven application.
Falueqg DTF Bible Flower Transfers, 15Pcs Iron-on Decals
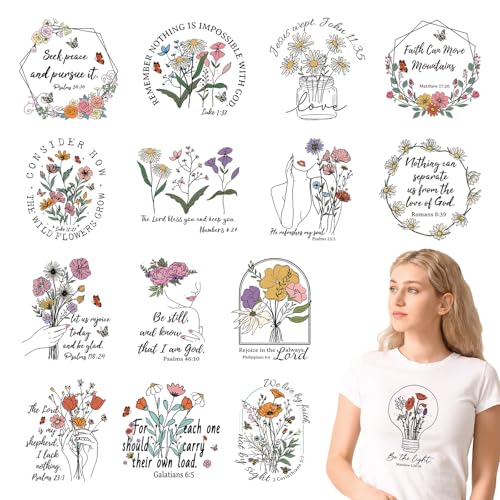
- ✓ Vibrant, detailed designs
- ✓ Easy to apply
- ✓ Long-lasting adhesion
- ✕ Limited size options
- ✕ Only suitable for cotton or similar fabrics
| Material | High-quality, safe vinyl |
| Size | Approximately 20×20 cm (8×8 inches) per decal |
| Application Temperature | 338°F (150°C) |
| Application Time | 10-15 seconds |
| Durability | Fade-resistant, peel-proof, washable, long-lasting adhesion |
| Number of Pieces | 15 decals |
The moment I pressed down the iron on one of these Falueqg Bible Flower Transfers, I was surprised by how smoothly it glided over the fabric. The vibrant floral and scripture designs instantly started to settle into my plain t-shirt, giving it a fresh, inspirational look.
I appreciated how easy it was to peel off the protective film afterward, revealing a crisp, seamless transfer that looked professionally done.
Each decal measures about 8×8 inches, which is just the right size for adding a meaningful touch without overwhelming the garment. I tried applying one to a hoodie and another to a pillow, and both adhered firmly without any bubbling or peeling.
The vinyl feels sturdy and flexible, so it moves with the fabric instead of cracking or cracking over time.
The best part? These transfers are washable and fade-resistant.
I threw my test pieces in the wash after a few days, and they still looked vibrant. No peeling or dulling, which is impressive for such an affordable product.
Plus, using a household iron at 338°F for just 15 seconds made the process quick and fuss-free—perfect for beginners and seasoned crafters alike.
If you’re looking to add a personalized, spiritual touch to your clothes or home decor, these transfers deliver. They stick well, look beautiful, and are super versatile—great for hats, bags, or even pillow covers.
Honestly, for just under $7, this set offers a creative way to make your items more meaningful.
Shejdgart Dtf Transfers Ready to Press – 20 Pcs Funny

- ✓ Vibrant, detailed designs
- ✓ Easy to use at home
- ✓ Washable and durable
- ✕ Limited to small patches
- ✕ Requires patience for cooling
| Material | Vinyl heat transfer stickers with vibrant colors and clear patterns |
| Sheet Size | Approximately 18×18 cm (7×7 inches) per sheet |
| Number of Sheets | 20 sheets included |
| Application Method | Heat press or household iron for 15-20 seconds |
| Washability | Suitable for washing after application |
| Intended Use | Iron-on patches for clothing, bags, pillows, and other fabric items |
I was surprised to find how effortlessly these Shejdgart DTF Transfers transformed my plain t-shirt into a fun, eye-catching piece in just minutes. I didn’t expect such vibrant colors and sharp patterns from a simple iron-on sheet—especially at this price point.
The sheets are nicely sized, about 7×7 inches, giving plenty of room for creative placement. The animal designs are hilarious and versatile, perfect for adding a quirky touch to clothes, bags, or even pillow covers.
I appreciated how easy it was to peel off the protective film once cooled; it felt like peeling a sticker without any fuss.
Using a household iron, I pressed each patch for about 20 seconds, and it adhered smoothly without any wrinkles or bubbles. The vinyl material feels sturdy and washable—my shirt came out looking fresh after a gentle wash.
It’s great to know these can stand up to regular laundry without losing their punch.
One thing I really liked was how quick the whole process was. No need for fancy equipment or complicated steps.
Just position, press, wait, and peel—simple enough for a beginner or someone in a rush.
Honestly, this set is a fun, affordable way to customize your wardrobe or give a humorous gift. Whether for yourself or a friend, the variety of animal patterns is sure to get laughs.
Plus, the stickers stay vibrant even after multiple washes, which is a big win.
Overall, I found this product a clever, hassle-free way to add personality to your clothes. Just be mindful to wait for the patches to cool completely before peeling for the best results.
What Are the Key Factors to Consider Before Ironing a Shirt?
Before ironing a shirt, several key factors should be considered to achieve the best results.
- Fabric Type: Different fabrics require different ironing techniques and temperatures.
- Shirt Condition: The condition of the shirt, including wrinkles and stains, can affect how you should iron it.
- Iron Settings: Properly setting the iron to the appropriate temperature for the fabric is crucial to avoid damage.
- Moisture Level: The moisture content of the shirt can influence how easily wrinkles are removed.
- Ironing Technique: Utilizing the correct technique, such as the right movements and pressure, is vital for effective ironing.
Fabric Type: Various fabrics like cotton, silk, and polyester have distinct properties that influence how they react to heat and pressure. For instance, cotton can withstand high temperatures, while silk requires a lower setting to prevent scorching. Understanding the fabric type ensures that you treat each shirt properly to maintain its integrity.
Shirt Condition: Inspecting the shirt for existing wrinkles, creases, or stains is essential prior to ironing. If a shirt has deep-set wrinkles, it may need more attention, while stains should be treated before ironing to avoid setting them in with heat. A well-prepared shirt makes the ironing process smoother and more effective.
Iron Settings: Most irons have specific temperature settings for different materials, and selecting the right one is critical to avoid burning or damaging the fabric. Always refer to the shirt’s care label to determine the recommended ironing temperature. Using the correct settings not only protects the garment but can also improve the ironing outcome.
Moisture Level: The moisture in the fabric plays a significant role in the ease of wrinkle removal; slightly damp shirts can be easier to iron than completely dry ones. Spraying some water or using a steam setting on the iron can help relax the fibers, making it simpler to smooth out wrinkles. However, be cautious not to over-saturate the fabric, as this can lead to water spots.
Ironing Technique: The way you maneuver the iron can profoundly impact the final look of the shirt. Techniques such as moving in straight lines and applying the right amount of pressure will help ensure an even finish without creating new creases. Practicing good ironing techniques can lead to a polished appearance and prolong the life of the garment.
What Essential Tools Do You Need for Ironing a Shirt?
The essential tools for ironing a shirt include:
- Iron: A high-quality steam iron is crucial for effectively removing wrinkles from fabric. Look for features like adjustable temperature settings, a non-stick soleplate, and a steam burst function to tackle tough creases.
- Ironing Board: An ironing board provides a flat, padded surface for ironing, making the process more efficient. Choose one that is sturdy and adjustable in height to ensure comfort while you work.
- Water Spray Bottle: A spray bottle filled with water can help dampen stubborn wrinkles before you iron. Lightly misting the fabric makes it easier to smooth out creases and can enhance the performance of your iron.
- Pressing Cloth: A pressing cloth protects delicate fabrics from direct heat and prevents shine. Using a cotton or linen cloth between the iron and the fabric is essential for items like silk or wool.
- Lint Roller: A lint roller is handy for removing dust, lint, and pet hair from your shirt before ironing. Starting with a clean surface ensures a smooth and polished finish after ironing.
- Starch or Sizing Spray: Fabric starch can add crispness to your shirt, giving it a professional appearance. Sizing sprays can also help in maintaining the fabric’s shape and make ironing easier.
What Temperature is Best for Ironing Different Fabrics?
The best temperature for ironing different fabrics varies based on the material type to prevent damage and achieve the best results.
- Cotton: The ideal temperature for ironing cotton is typically around 400°F (204°C). This high setting effectively removes wrinkles and creases, and using steam can enhance the process further for a crisp finish.
- Linen: Linen should be ironed at a temperature of about 450°F (232°C). This fabric benefits from a high heat setting, and it’s recommended to iron it while it’s still slightly damp to achieve the best results and maintain its natural texture.
- Synthetic Fabrics (like polyester): For synthetic fabrics, a lower temperature of around 300°F (149°C) is best. High heat can cause melting or shiny marks, so using a pressing cloth can help protect these delicate materials during ironing.
How Should You Prepare Your Shirt Before Ironing?
To ensure a crisp and well-pressed shirt, it is essential to prepare it properly before ironing. Here are the best ways to iron a shirt:
- Check the care label: Always begin by checking the care label of your shirt for specific instructions regarding temperature and ironing methods.
- Wash and dry appropriately: Make sure the shirt is clean and slightly damp or completely dry, depending on the fabric type, as this can significantly affect the ironing process.
- Use the right ironing board: Set up an ironing board that is sturdy and offers ample space to maneuver the shirt easily; this will help you achieve a more efficient ironing experience.
- Prepare the iron: Fill the iron with water if you’re using the steam function, and set it to the appropriate temperature for the fabric to avoid scorching.
- Start with collars and cuffs: Begin ironing the collar and cuffs first, as they are the most visible areas; this will also allow the remaining fabric to hang freely as you work on it.
- Iron in sections: Divide the shirt into sections (front, back, sleeves) and iron each section methodically to ensure every part is evenly pressed without missing spots.
- Use a pressing cloth: For delicate fabrics, consider using a pressing cloth to protect the material from direct heat, preventing damage and shine marks.
What Are the Most Effective Steps to Iron a Shirt?
The best way to iron a shirt involves a series of systematic steps to ensure a crisp and wrinkle-free finish.
- Prepare Your Iron and Board: Ensure your iron is clean and filled with distilled water if it has a steam function. Set your ironing board at a comfortable height, and use a padded cover to prevent any fabric damage.
- Check Fabric Care Labels: Always read the care labels on your shirt to determine the appropriate heat setting for ironing. Different fabrics like cotton, polyester, or linen require different temperatures to avoid burns or damage.
- Start with the Collar: Begin by ironing the collar, starting from the outer edges and working inwards. This technique helps maintain the collar’s shape and ensures a polished look.
- Iron the Sleeves: Lay one sleeve flat on the board and iron from the shoulder seam down to the cuff. Be mindful of any pleats or cuffs, and use the narrow end of the board for better control.
- Iron the Body: Move on to the body of the shirt, starting with one side and working your way to the other. Use steam as needed to tackle stubborn wrinkles, and be cautious around buttons and seams to avoid damage.
- Finish with the Back: Turn the shirt inside out and iron the back, ensuring that all areas are smooth. Pay attention to the yoke (the part around the shoulders) to keep the shirt looking neat overall.
- Hang Immediately: After ironing, hang the shirt on a hanger to prevent new wrinkles from forming. Allow it to cool in this position to help set the pressed finish.
What Common Mistakes Should You Avoid When Ironing a Shirt?
When ironing a shirt, there are several common mistakes to avoid for the best results.
- Not checking the fabric care label: Failing to read the care label can lead to using the wrong heat setting, potentially damaging the fabric. Different materials require different temperatures, and a label provides essential guidelines to ensure your shirt is ironed safely.
- Ignoring wrinkles in hard-to-reach areas: Many people focus on the visible parts of the shirt and neglect areas like the collar, cuffs, and seams. These overlooked spots can make the shirt appear unkempt, so it’s important to pay attention to every section for a polished look.
- Using too much steam: Although steam can help remove wrinkles, excessive steam can leave the fabric damp, which may lead to more wrinkles as it dries. A light misting is usually sufficient, and ensuring the shirt is slightly damp before ironing can be more effective without overdoing it.
- Ironing on the wrong side: Ironing the shirt on the right side can lead to shine marks, especially on darker fabrics. It’s generally better to iron the shirt inside out to protect the fabric’s finish and maintain its appearance.
- Not using the right ironing technique: Many people simply press the iron down without gliding it smoothly over the fabric, which can create more wrinkles. The best technique involves moving the iron in straight lines and avoiding circular motions, which can distort the fabric.
- Skipping the starch: While not essential for every shirt, using starch can help create a crisp finish and keep wrinkles at bay. However, it’s important to apply it evenly and avoid over-saturating the fabric, as this can lead to buildup and stiffness.
- Ironing a shirt when it’s too dry: Ironing a completely dry shirt can make it difficult to remove wrinkles effectively. It’s best to iron a shirt that is slightly damp or to use a spray bottle to lightly mist it before ironing, making the process more efficient.
How Can You Maintain the Results of a Well-Ironed Shirt?
To maintain the results of a well-ironed shirt, several strategies can be employed:
- Proper Storage: Store the ironed shirt on a good-quality hanger to maintain its shape and reduce wrinkles.
- Use a Garment Bag: When traveling or storing for an extended period, use a breathable garment bag to protect the shirt from dust and creases.
- Steam When Needed: Use a steamer or the steam function on your iron for quick touch-ups to remove any wrinkles that may form after ironing.
- Avoid Overloading the Closet: Ensure that the shirt is not crammed in with other clothes, as this can lead to creasing and loss of the crisp finish.
- Choose the Right Fabric Care: Utilize fabric sprays or starch to help maintain the crispness of the shirt after ironing.
Proper storage is essential because hanging the shirt on a sturdy hanger keeps it from becoming misshapen and helps maintain the freshly ironed look. Make sure the hanger is wide enough to support the shoulders of the shirt without causing it to slip off or become warped.
Using a garment bag is particularly useful for protecting the shirt during travel or prolonged storage, as it shields the fabric from dust and prevents it from rubbing against other garments that might cause wrinkles.
Steam when needed allows for quick fixes; the heat and moisture from steam can relax the fibers of the fabric, making it easier to eliminate small wrinkles without the need to re-iron the entire shirt.
Avoiding overloading the closet is crucial, as too many garments squeezed together can cause unwanted creases and diminish the sharp appearance of an ironed shirt.
Choosing the right fabric care products, like sprays and starch, can enhance the shirt’s finish, providing additional stiffness and protection against wrinkling, thus preserving the ironed look for longer periods.
Related Post: