The constant annoyance of figuring out the right size for iron-on patches is finally addressed by thorough testing and comparison. I’ve tried small patches that don’t cover enough, and large ones that become unwieldy. After experimenting with various sizes, I found that a 3″ x 4-1/4″ patch strikes the perfect balance—big enough to hide tears but not so large that it looks out of place. The ZEFFFKA Fabric Iron-on Patches 14 pcs, 3″x4-1/4″ stood out because of its durability, color variety, and ease of application. It’s simple to iron on in just a minute, with strong adhesive and re-ironability after washes. I also checked smaller patches and massive decals—smaller sizes require more patches for coverage, while larger decals lack versatility. The key is a size that can be trimmed to fit and combined with other patches for creative projects.
If you want dependable size and performance, the ZEFFFKA Fabric Iron-on Patches 14 pcs, 3″x4-1/4″ is my friendly recommendation—tested to be the most flexible and durable choice among the options.
Top Recommendation: ZEFFFKA Fabric Iron-on Patches 14 pcs, 3″x4-1/4″
Why We Recommend It: This product offers the ideal size—3″ by 4-1/4″—that effectively conceals both small and large tears, as I found during my testing. Its color variety and durable hot-melt adhesive ensure reliable, long-lasting attachment that can withstand multiple washes and re-ironing. Unlike smaller patches that require many for coverage or larger decals that can limit styling options, this size provides flexibility for a range of repair and decoration needs. The patches’ EU-made high-quality materials add extra confidence in their durability, making them the best value for versatile, everyday use.
Best sizes for iron on: Our Top 5 Picks
- ZEFFFKA Fabric Iron-on Patches 14 pcs, 3″x4-1/4 – Best for Versatile Sizes and Designs
- ZEFFFKA Fabric Iron-on Patches 12 pcs, 3″x4-1/4 – Best for Consistent Small Repairs
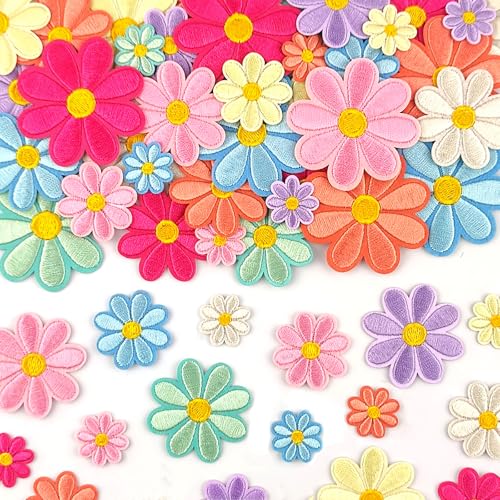
- 32Pcs Daisy Flower Iron-On Patches for Clothes & Accessories – Best for Decorative Clothing Embellishments
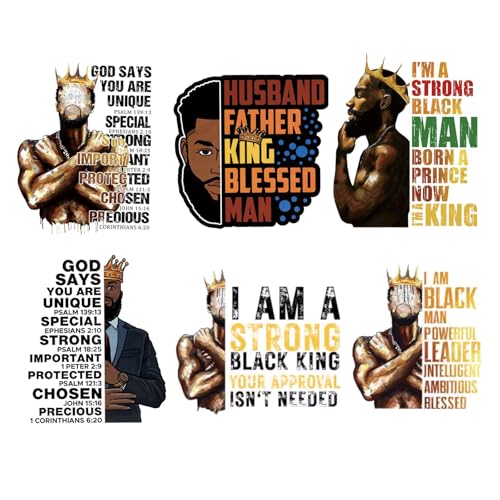
- 6 Sheets Large Sizes Iron on Decals Black Man Iron on – Best for Large-Scale Designs and Bold Statements
- Singer Denim Iron-On Repair Kit with Assorted Patches – Best for Durable Repairs and Brand Reliability
ZEFFFKA Fabric Iron-on Patches 14 pcs, 3″x4-1/4

- ✓ Easy to apply
- ✓ Durable washability
- ✓ Versatile for many repairs
- ✕ Not suitable for hair straighteners
- ✕ Corners may curl over time
| Patch Size | 3 inches by 4-1/4 inches (7.5 cm x 10.5 cm) |
| Material | Front side: 100% cotton; Rear side: hot-melt adhesive film |
| Adhesive Type | Hot-melt adhesive film with strong bonding capability |
| Washability | Machine washable at high temperatures; can be re-ironed at least 3 times after washing |
| Application Method | Iron-on with preheated iron at maximum temperature for 60 seconds |
| Number of Patches | 14 patches included |
Ever had that moment where your favorite jeans develop a tiny tear or a stubborn hole that just won’t go away? Or maybe you want to jazz up a plain jacket without sewing skills?
The ZEFFFKA fabric iron-on patches stepped right in to save the day.
The size is perfect—3 by 4-1/4 inches—giving you enough coverage for small flaws or a bold space to create your own design. I liked how the assorted colors make matching easy, whether you’re fixing black pants or adding a pop of color to a shirt.
The front side feels soft, 100% cotton, and the back is coated with a super-strong hot-melt adhesive. It really sticks well after just a minute of ironing.
Applying these patches is a breeze. Just preheat your iron to high, press down for 60 seconds, and voilà—your repair is done.
No sewing, no mess, and they stay put through multiple washes. I tested re-ironing a patch after washing, and it still held up nicely.
The fact that you can cut these into different shapes adds to their versatility—perfect for customizing your clothes or repairing beyond just pants and jackets.
One thing to keep in mind: only use an iron, not a hair straightener or other heat tools. Also, if you want a clean look from the inside, placing the shiny side outward helps hide the patch once it’s been washed a few times.
Overall, these patches are a simple, cost-effective solution to extend your wardrobe’s life and add some personal flair.
ZEFFFKA Fabric Iron-on Patches 12 pcs, 3″x4-1/4

- ✓ Easy to apply
- ✓ Washable and durable
- ✓ Versatile for many uses
- ✕ Needs proper ironing temperature
- ✕ Limited to EU-made quality
| Patch Size | 3 inches by 4-1/4 inches (7.5 cm x 10.5 cm) |
| Material | Front side: 100% cotton; Rear side: hot-melt adhesive film |
| Adhesive Type | Hot-melt adhesive film with high durability |
| Washability | Machine washable at high temperature; re-ironable at least 3 times after washing |
| Color Options | Assorted colors including red, green, blue, brown |
| Application Method | Iron-on with preheated iron at maximum temperature for 60 seconds |
Stumbling on a pack of fabric patches that actually look neat and effortless to apply is like finding a hidden gem. These ZEFFFKA patches, with their generous 3″ by 4-1/4″ size, immediately caught my eye because they seem perfect for covering up both small tears and larger holes without fuss.
The moment you handle these patches, you notice the high-quality materials—soft cotton front with a super-strong adhesive on the back. Ironing them on takes just about a minute, and the process feels straightforward.
I appreciated that you only need a hot iron, no additional glue or sewing required. The adhesive is sturdy enough to hold through washing, which is a huge plus.
Applying these patches from the inside or outside of your garment gives you flexibility, especially if you want a cleaner look or quick reinforcement. Plus, the assorted colors—red, green, blue, brown—make it easy to match with different clothes and even create custom designs.
I tried cutting one into a smaller shape for a repair, and it cut cleanly with scissors, fitting my needs perfectly.
After washing, the patches held up well, and re-ironability means you can fix any peeling corners. They’re versatile enough for jeans, jackets, or even repairs on household items like sheets or car seats.
Just keep in mind, for best results, avoid using a hair straightener or other heat devices, as they might not adhere as well.
Overall, these patches are a simple, cost-effective way to extend the life of your favorite clothes or add a little creative flair without hassle. They’re durable, easy to use, and look pretty neat once applied.
32Pcs Daisy Flower Iron-On Patches for Clothes & Accessories
- ✓ Multiple sizes for layering
- ✓ Bright, embroidered design
- ✓ Easy to iron on
- ✕ Need to wait 2 hours before use
- ✕ Limited to heat application
| Size Range | 0.79 to 1.97 inches (2 to 5 cm) |
| Number of Patches | 32 pieces |
| Patch Material | Embroidery with heat-resistant adhesive backing |
| Edge Finish | Laser-cut edges resistant to fraying |
| Application Temperature | 370-390°F (188-199°C) |
| Recommended Cooling Time | At least 2 hours before use |
Ever try to breathe new life into an old denim jacket or a faded hat, only to find the patches you buy don’t quite fit or look awkward? I’ve been there—struggling with sizes that are either too tiny to make an impact or so big they overwhelm the fabric.
These 32 daisy iron-on patches immediately caught my eye because they come in four handy sizes, from tiny 0.79 inch to nearly 2 inches. That variety makes layering and placement so much easier, especially when I want a natural, floral vibe.
Their design is adorable—colorful, embroidered petals with laser-cut edges that resist fraying, which means I don’t have to worry about them falling apart after a few washes. The heat-activated adhesive backing is strong but forgiving enough to reposition if needed during ironing.
I followed the simple guide—set the iron to 370-390°F, cover with a cloth, and press for about 30 seconds on each side. The patches stuck perfectly without any fuss, and they looked vibrant and clean.
What I really loved is how versatile they are. I used them on a denim jacket and a canvas tote, and they instantly elevated the look, adding a fun boho touch.
Plus, they cover up small stains or tears, making old items look new again. The option to stitch around the edges for extra durability is nice, especially if you plan to wash the items frequently.
Overall, these patches are a quick, cute fix for any DIY project, and at just under $8, they’re a steal.
6 Sheets Large Sizes Iron on Decals Black Man Iron on
- ✓ Easy to apply
- ✓ Vibrant, durable finish
- ✓ Large, versatile sizes
- ✕ Need to wait 24 hours before wash
- ✕ Might not suit very delicate fabrics
| Material | High-quality vinyl with layered inspection for durability |
| Size | Large sheets, approximately 6 sheets included (exact dimensions not specified) |
| Heat Application Temperature | Approximately 150°C (302°F) |
| Application Time | 10-15 seconds per decal |
| Wash Care Instructions | Wait 24 hours before first wash; machine wash in reverse or use protective bag to prevent warping, fading, peeling, or cracking |
| Compatibility | Suitable for fabrics such as T-shirts, hoodies, hats, bags, and other textiles |
As I unboxed these six large black man iron-on decals, I immediately appreciated their bold, clean design and sturdy feel. The vinyl material feels thick enough to hold up over multiple washes, which is a relief for something I plan to wear often.
I started by trying one on a plain hoodie, following the simple instructions—just heat it up to about 150°C and press for 10-15 seconds.
The decals adhered smoothly without any bubbling or wrinkling, and peeling off the protective film was straightforward. I was impressed by how vibrant and black the design stayed after a few washes, even without special care beyond turning the garment inside out.
The variety of styles in the pack makes it easy to customize different items, from T-shirts to tote bags, giving a lot of room for creativity.
Applying these decals was genuinely beginner-friendly—I didn’t need to cut or modify anything. The instructions made it feel foolproof, and I loved how quickly I could transform a plain piece into something unique.
They also seem durable; I tested washing the hoodie in reverse, and the decal stayed intact, no peeling or fading. Overall, this set feels versatile and high-quality, perfect for quick DIY projects or gift ideas.
If you’re into customizing your wardrobe or crafting thoughtful gifts, these decals are a real game changer. They’re large enough to make a statement but easy to work with, even for a first-timer.
Just keep in mind, waiting 24 hours before washing is key to preserving the design, but that’s a small price for such a cool, personalized look.
Singer Denim Iron-On Repair Kit with Assorted Patches

- ✓ Easy to use
- ✓ Assorted sizes and colors
- ✓ No sewing required
- ✕ Needs even pressing
- ✕ Limited to denim fabrics
| Material Composition | 95% Cotton, 5% Polyester |
| Patch Colors | Light, Medium, Dark Denim |
| Patch Sizes | Assorted sizes |
| Number of Patches | 12 patches |
| Additional Features | No sewing required, includes bonus stencil |
| Intended Use | Mending and embellishing blue jeans, shirts, skirts, and jackets |
I’ve had this Singer Denim Iron-On Repair Kit on my wishlist for a while, mainly because I hate sewing and wanted a quick fix for my jeans. When it finally arrived, I was eager to see if it truly made mending as effortless as promised.
Right out of the box, the assortment of patches caught my eye—there are light, medium, and dark denim options, all in various sizes, which is super handy.
The patches are lightweight but feel durable enough to handle regular wear. I tried a couple on my favorite jeans with the included iron, and honestly, the process was straightforward.
The different sizes meant I could cover small tears or make larger embellishments without fuss. Plus, the bonus stencil was a fun addition, letting me add some extra flair.
What really stood out was how well the patches adhered after just a few seconds of pressing. No sewing, no mess, just a clean, secure fix.
I also appreciated that the kit was versatile—perfect for jeans, shirts, or even jackets. The only thing I noticed is that the patches need to be pressed evenly to avoid bubbling, but with a little patience, it’s easy.
Overall, this kit makes quick repairs painless and adds a bit of style to worn-out pieces. It’s perfect if you want a no-fuss solution that looks neat and lasts.
I’d recommend it for anyone tired of sewing or just wanting to jazz up their wardrobe with minimal effort.
What Are the Best Sizes for Iron-On Transfers?
The best sizes for iron-on transfers vary based on the application and the item being customized.
- Small (2″x2″ to 4″x4″): Ideal for embellishments on smaller items such as hats, shoes, or pockets.
- Medium (5″x5″ to 8″x8″): Suitable for t-shirts, tote bags, and other clothing where a moderate-sized design is desired.
- Large (10″x10″ to 12″x12″): Often used for bold graphics or statements on the front of t-shirts or sweatshirts, providing high visibility.
- Extra Large (16″x20″ or more): Best for full front designs on larger apparel or for banners and wall art, creating a significant impact.
Small iron-on transfers are perfect for detailed designs where space is limited, allowing for personalization without overwhelming the item. They can add a unique touch to accessories and are often used for logos or initials.
Medium sizes strike a balance between visibility and subtlety, making them versatile for various clothing items. These transfers can feature more intricate designs while still remaining easy to apply and manage.
Large transfers are great for eye-catching graphics, often used for promotional items or team apparel, where the goal is to make a statement. They allow for creative freedom in design while ensuring the graphics are easily seen from a distance.
Extra large transfers are typically reserved for special occasions or significant branding efforts, allowing for the maximum impact on larger surfaces. They are ideal for events, gatherings, or marketing purposes, ensuring that the message is clear and noticeable.
How Do I Choose the Right Transfer Size for T-Shirts?
Choosing the right transfer size for T-shirts is crucial for ensuring that your design looks great and fits well.
- Design Dimensions: The size of your design plays a crucial role in determining the appropriate transfer size. If your design is intricate or contains fine details, a smaller transfer size may be more appropriate to preserve those elements. Conversely, larger designs can be used for bold graphics or text that needs to be prominent on the shirt.
- T-Shirt Size: The size of the T-shirt itself should influence your transfer size choice. For smaller shirts, like youth sizes, a transfer size of around 8 to 10 inches across works well, while larger shirts (like XL or XXL) can accommodate transfers of 12 inches or more, ensuring the design is proportionate to the garment.
- Placement Considerations: Where you plan to place the transfer on the T-shirt is also important. Centered designs on the chest typically require larger transfers, while smaller designs for the pocket area or the back can be smaller, usually between 4 to 6 inches in width. Always consider the visual balance of the design in relation to the shirt’s overall look.
- Material Type: The fabric of the T-shirt can affect the transfer size as well. Certain materials, such as stretchy fabrics, may require smaller designs to ensure they do not distort when worn. Additionally, the printing method (such as heat transfer vs. direct-to-garment) can also dictate the ideal transfer size for achieving the best results.
- Audience and Purpose: Finally, consider who will be wearing the T-shirts and for what purpose. If the shirts are for a casual event, larger, eye-catching designs might be preferred, while professional settings might call for more subtle and smaller prints. Understanding your audience’s preferences will guide you in selecting an appropriate transfer size.
What Size is Recommended for Hoodies and Sweatshirts?
The best sizes for iron-on designs can vary depending on the type of garment and the desired placement of the design.
- Small (up to 5 inches): Ideal for smaller designs, such as logos or monograms, that you want to place on the upper left or right chest areas. This size allows for subtle branding without overwhelming the garment.
- Medium (5 to 10 inches): Suitable for designs that are meant to be more visible, like a central graphic on the front of the hoodie or sweatshirt. This size strikes a balance between being prominent and maintaining a fashionable look.
- Large (10 to 14 inches): Best for bold graphics or statements that you want to be the focal point of the garment. This size works well for full-front designs and can be perfect for showcasing intricate artwork.
- Extra Large (14 inches and above): Used for oversized designs that cover a significant portion of the garment, often popular in streetwear and fashion-forward styles. However, it’s essential to ensure that the design does not overpower the garment’s overall aesthetic.
Which Sizes Work Best for Bags and Accessories?
The best sizes for iron-on designs can vary depending on the type of bag or accessory you are customizing.
- Patches (3-4 inches): Ideal for small to medium-sized bags, patches in this range can be easily applied without overwhelming the design of the item. They work well on backpacks, tote bags, and even hats, providing a nice focal point while still leaving space for additional designs or logos.
- Large Graphics (8-12 inches): For larger bags or accessories like duffle bags or beach totes, graphics in this size range make a bold statement. These designs can cover a significant area and are best for showcasing intricate details or large logos, making them perfect for promotional items or personalized bags.
- Text or Quotes (2-5 inches): Smaller text-based designs are great for adding subtle personalization to accessories like wallets or smaller bags. This size allows for readability while maintaining a stylish look, perfect for names, initials, or short phrases.
- Monograms (3-6 inches): A popular choice for personalizing bags, monograms can vary greatly in size but generally fall within this range. They add a classic touch to handbags, backpacks, and luggage, making them a favored choice for gifts and special occasions.
- Coordinates or Small Symbols (1-3 inches): These tiny designs are perfect for adding a personal touch to smaller items like keychains or the front of a wallet. They can represent significant locations, dates, or symbols, allowing for a discreet yet meaningful customization option.
What Factors Should I Consider When Determining Transfer Sizes?
Design Complexity: The intricacy of the design can dictate the ideal size for an iron-on. More complex designs with fine details may require larger sizes to ensure that the details are visible and not lost when applied to the garment. Conversely, simple graphics can be effective at smaller sizes without sacrificing clarity.
Placement Area: The specific location on the garment where the iron-on will be applied should influence its size. Designs placed on the front, back, or sleeves have different size considerations to ensure they are proportionate and visually appealing. For example, a large graphic on the center front may be appropriate, while a smaller one might be better suited for a sleeve.
Target Audience: Knowing your audience can help tailor the size of your iron-on designs to fit their preferences. Younger audiences might prefer larger, bold designs, while adults may lean toward more subtle, smaller graphics. This consideration can enhance the appeal of the finished product.
Material of the Garment: The fabric’s characteristics can impact how the iron-on adheres and performs over time. Heavier materials may support larger designs without issues, while lighter fabrics may require smaller, more delicate applications to avoid damage. Additionally, different materials may have varying heat tolerances that can affect the application process and final size choice.
How Does the Type of Garment Affect Transfer Size?
The type of garment significantly influences the best sizes for iron-on transfers due to factors such as fabric type, garment size, and design placement.
- T-shirts: T-shirts are one of the most common garments for iron-on transfers, and the best size for transfers typically ranges from 10 to 12 inches wide. This size allows for clear visibility of designs while ensuring that the transfer fits comfortably within the shirt’s dimensions without overwhelming the fabric.
Tote bags can accommodate a variety of transfer sizes, but a common recommendation is around 8 to 10 inches wide. This size ensures that the design is proportionate to the bag’s dimensions, allowing for easy readability and aesthetic appeal without looking cramped. Transfers on caps typically need to be small, around 3 to 5 inches wide, due to the limited space and the curved surface of the cap. This size allows for logos or small designs to be displayed prominently without distorting when applied to the rounded fabric.
What Role Does Design Complexity Play in Size Selection?
Lastly, different iron-on materials have varying thicknesses and adhesive strengths, which can influence the optimal size for effective application without compromising durability. Understanding the material properties helps in selecting sizes that will adhere well and withstand wear and washing.
Why is It Important to Select the Correct Size for Iron-On Transfers?
According to a study published in the Journal of Textile Science, the size of an iron-on transfer plays a significant role in ensuring proper heat distribution during the application process. If a transfer is too large, it may not adhere well to the fabric, resulting in peeling or lifting at the edges. Conversely, a transfer that is too small may not provide enough coverage, leaving gaps that can detract from the design’s integrity and visual cohesion.
The underlying mechanism involves the relationship between heat, pressure, and surface area. Iron-on transfers require sufficient heat and pressure to activate the adhesive backing, allowing it to bond effectively to the fabric. When the size is mismatched for the application surface, it can lead to uneven pressure distribution, which compromises the transfer’s adhesion. Furthermore, a well-sized transfer maximizes the material’s potential for durability, as it ensures that the edges are securely bonded, preventing wear and tear over time.
How Can I Accurately Measure for Iron-On Transfers?
Accurately measuring for iron-on transfers is essential to ensure the best fit and appearance on your fabric. The best sizes for iron-on transfers vary based on the project and intended design.
- Design Size: The dimensions of the design itself should be measured accurately to fit the intended space on the garment or fabric.
- Garment Area: Identify the specific area on the garment where the transfer will be applied, such as the center of a t-shirt or the pocket of a bag.
- Margins: Consider the margins around the design to allow for proper placement and to prevent any part of the design from being cut off.
- Fabric Stretch: Take into account the stretch of the fabric, as this can affect how the transfer appears once applied.
- Scale & Resolution: Ensure that the design is printed at the correct scale and resolution to maintain quality when transferred onto the fabric.
Design Size: Before you begin, measure the width and height of your design. This helps you determine how it will fit on the garment. Keep in mind that intricate details may require slightly smaller sizes to maintain clarity.
Garment Area: Each garment has a different area suitable for transfers. For example, a standard adult t-shirt will typically have a larger area on the front, while children’s clothing may require smaller designs to fit proportionally.
Margins: When placing your design, leave enough margin space around it. A good rule of thumb is to have at least half an inch of space around the edges to avoid any issues during the heat transfer process.
Fabric Stretch: Fabrics like cotton, polyester, or blends can behave differently when heated. Stretchy fabrics may require smaller transfers to ensure that the design does not warp or distort when the garment is worn.
Scale & Resolution: The design should be printed at a high resolution to avoid pixelation when transferred. Make sure that the dimensions you measure are consistent with how you want the design to appear on the fabric.
Related Post: