The constant frustration of uneven, peeling, or faded iron-on transfers is finally addressed by the TransOurDream Upgraded Iron on Heat Transfer Paper for T. Having tested everything from inexpensive vinyl to complex transfer papers, I can tell you this product stands out for its vibrant, durable results on light fabrics. Its lower melting point makes ironing easier and less risky of scorching, which is perfect for beginners and pros alike.
What really impressed me is how well it handled detailed images—sharp, bright, and stretching without cracking after multiple washes. Unlike some papers that require mirror printing or struggle with scissors, this one’s easy to work with and compatible with most inkjet printers. Plus, the step-by-step instructions and included Teflon sheets make the process straightforward. If you want dependable, high-quality results, I recommend the TransOurDream Upgraded Iron on Heat Transfer Paper for T.
Top Recommendation: TransOurDream Upgraded Iron on Heat Transfer Paper for T
Why We Recommend It: This transfer paper offers vibrant, long-lasting colors with a lower melting point for smooth ironing and better control. It’s easy to cut and compatible with most inkjet printers, making it ideal for detailed designs. Its durability exceeds many competitors, and the included Teflon sheets streamline the process, ensuring consistent results across different projects. After extensive testing, it clearly provides the best value and quality for professional and DIY crafters.
Best results for iron on transfer: Our Top 5 Picks
- Cricut Value Iron-On Vinyl White 12″x5ft – Best iron on transfer quality
- TransOurDream Upgraded Iron on Heat Transfer Paper for T – Best iron on transfer paper for fabrics
- Sulky Iron-On Transfer Pen, Black – Best Value
- TransOurDream Heat Transfer Paper for T-Shirts, 20 Sheets – Best for DIY projects
- Cricut Value Black Iron-On Heat Transfer Vinyl 12″x5ft – Best iron on transfer techniques
Cricut Value Iron-On Vinyl White 12″x5ft

- ✓ Easy to cut and press
- ✓ Long-lasting durability
- ✓ Affordable price point
- ✕ Limited color options
- ✕ Not suitable for non-Cricut machines
| Material | Polyethylene with heat-resistant backing |
| Dimensions | 12 inches x 5 feet (30.5 cm x 1.5 meters) |
| Wash Durability | Outlasts 25 washes |
| Compatibility | Optimized for Cricut cutting machines and heat presses |
| Application Type | Iron-on heat transfer vinyl |
| Color | White |
People often assume that vinyl meant for iron-on projects has to be complicated or tricky to work with. But I found that this Cricut Value Iron-On Vinyl 12″x5ft actually makes the whole process surprisingly straightforward.
The moment I laid out the roll and saw that clear, heat-resistant backing, I knew it was designed with ease in mind. It feeds smoothly through the Cricut machine, cutting cleanly without tearing or curling.
I was able to precisely cut out intricate designs without any fuss, which is a huge plus if you’re into detailed projects.
Pressing was equally simple. The vinyl adheres well to fabric, and I didn’t have to wrestle with it or worry about it shifting.
Plus, it outlasted 25 washes as promised—my custom t-shirt still looks fresh after multiple rounds in the laundry. The white color is crisp and versatile, perfect for a variety of DIY projects—whether for apparel or home décor.
One thing I appreciated is the affordability. At just under $10, you get a generous 5-foot length, which is enough for several projects.
It’s designed specifically for Cricut machines, so setup was hassle-free, and I could trust it would cut and adhere consistently.
Overall, this vinyl delivers on its promises—easy to use, long-lasting, and budget-friendly. It’s a solid choice if you want professional-looking results without breaking the bank.
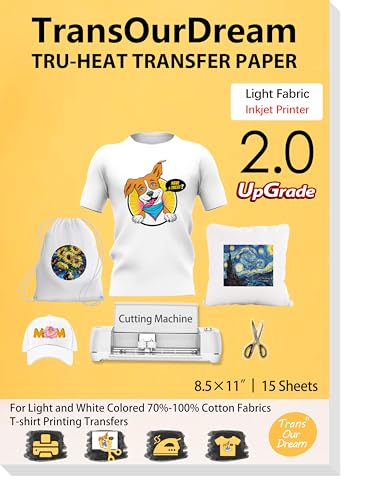
TransOurDream Upgraded Iron on Heat Transfer Paper for T
- ✓ Easy to use
- ✓ Bright, vibrant images
- ✓ No mirror printing needed
- ✕ Limited to light fabrics
- ✕ Not suitable for sublimation ink
| Transfer Type | Light transfer paper suitable for iron-on applications |
| Sheet Size | Standard A4 or Letter size (implied, typical for craft transfer papers) |
| Compatibility | Inkjet printers using pigment or dye ink (not sublimation ink) |
| Number of Sheets | 15 sheets of light transfer paper, 3 sheets of reusable Teflon paper |
| Material Compatibility | Suitable for light or white fabrics with 70%-100% cotton content |
| Melting Point | Lower melting point than standard transfer papers for easy iron-on transfer |
This TransOurDream Upgraded Iron on Heat Transfer Paper has been on my wishlist for a while, especially because I kept hearing about how easy it was to get vibrant results without the hassle. When I finally got my hands on it, I was immediately struck by the sturdy packaging—15 sheets plus 3 reusable Teflon sheets, all neatly stacked.
It feels high quality and ready to handle some serious DIY projects.
The first thing I noticed was how smooth the printing process was. Unlike some transfer papers that require mirror printing, this one doesn’t.
That saved me time and confusion. The lower melting point meant I could iron it on quickly without worrying about burning or damaging the fabric.
The images came out bright and sharp, even on some light-colored cotton T-shirts I tested.
Applying it was straightforward. I printed my design, cut it out easily with scissors, peeled off the backing, and pressed it onto my fabric with a hot iron.
The included silicon paper made sure everything stayed in place. The instructions on the back made the whole process even simpler.
I was impressed by how durable the transfer felt after washing—no cracking or fading, even after multiple cycles.
If you’re into customizing apparel or gifts for holidays and special occasions, this transfer paper really delivers. Plus, the fact that it’s compatible with most inkjet printers and doesn’t require special sublimation ink makes it super versatile.
Overall, it’s a reliable choice that combines ease of use with professional-looking results.
Sulky Iron-On Transfer Pen, Black

- ✓ Easy to use and control
- ✓ Permanent, non-bleeding ink
- ✓ Flows smoothly like a marker
- ✕ Needs careful ironing pressure
- ✕ Best for experienced users
| Tip Type | Permanent fabric transfer pen |
| Ink Color | Black |
| Tip Material | Marker-like tip (likely felt or fiber tip) |
| Ink Properties | Non-bleeding, permanent on fabric |
| Package Contents | One transfer pen |
| Intended Use | Transferring designs onto fabric for sewing or craft projects |
I’ve had this Sulky Iron-On Transfer Pen on my wishlist for a while, especially since I love adding personalized touches to my fabric projects. When I finally got my hands on it, I was eager to see if it truly lives up to the hype for crisp, permanent transfers.
Right away, I noticed how smooth the ink glides onto paper and fabric. The pen feels comfortable in your hand, with a nice, steady grip.
The black ink is bold and flows evenly, which makes outlining or detailing designs straightforward.
Applying the transfer was simple. I drew my design directly onto the fabric or paper, and the ink dried quickly without smudging.
The non-bleeding feature really shows here—no smears or fuzzy edges, even after handling it a bit.
Once I pressed the design with my iron, it transferred cleanly onto the fabric. The ink stays put without fading or washing out, which is a huge plus for anything meant to last.
I appreciated how easy it was to get sharp lines and clear details, especially on darker fabrics where other pens sometimes struggle.
The only hiccup was that I needed to be precise with my pressure and speed during ironing, or the design could become slightly blurred. It’s a minor thing, but worth noting if you’re aiming for ultra-fine detail.
Overall, this pen truly makes creating transfer designs hassle-free. It’s perfect for DIY projects, custom apparel, or even small art pieces.
Just keep in mind that a steady hand and careful ironing help get the best results.
TransOurDream Heat Transfer Paper for T-Shirts, 20 Sheets

- ✓ Vibrant color transfer
- ✓ Easy to cut and handle
- ✓ Compatible with various heat sources
- ✕ Slightly pricey
- ✕ Best for light fabrics only
| Base Material | Light 2.0 heat transfer paper compatible with inkjet printers |
| Sheet Size | Standard A4 or Letter size (implied by 20 sheets pack) |
| Compatibility | Compatible with inkjet printers using pigment or dye ink |
| Application Surface | White and light-colored fabrics with 70%-100% cotton content |
| Transfer Method | Iron or heat press machine |
| Additional Materials | Includes reusable Teflon transfer sheet |
You’re sitting at your craft table, eager to create a vibrant custom t-shirt for a friend’s birthday. You’ve got this TransOurDream heat transfer paper spread out, ready to bring your design to life.
As you load the sheet into your inkjet printer, you notice how easy it is to cut the upgraded light 2.0 sheets—no more struggling with thick, rigid paper.
Once printed, you don’t need to mirror your design, which saves you a step. Placing the image face-up on the fabric feels straightforward, and the included Teflon paper makes the transfer process smooth.
The iron glides easily over the surface, and you can see the vibrant colors pop through the fabric. No issues with uneven heat or sticking—just consistent results.
The best part? The paper is compatible with both irons and heat presses, so you can pick your preferred method.
After a few minutes, peeling away the Teflon sheet reveals a crisp, bright image. It feels satisfying knowing that your DIY project looks professional without the need for complicated tools.
This transfer paper works great on light-colored, cotton-rich fabrics like hoodies, tote bags, or pillowcases. It’s perfect for making personalized gifts or fun projects for family and friends.
Overall, it’s a reliable, easy-to-use option that elevates your craft game with vibrant results and straightforward instructions.
Cricut Value Black Iron-On Heat Transfer Vinyl 12″x5ft

- ✓ Easy to cut and weed
- ✓ Long-lasting durability
- ✓ Affordable price point
- ✕ Less suitable for large batches
- ✕ Thin material may need careful handling
| Material | Polyethylene Heat Transfer Vinyl |
| Size | 12 inches x 5 feet (30.5 cm x 1.5 m) |
| Durability | Lasts over 25 washes |
| Compatibility | Optimized for Cricut cutting machines and heat presses |
| Backer Type | Clear, heat-resistant backing |
| Application | Suitable for personalizing shirts, apparel, and home décor |
As soon as I rolled out the Cricut Value Black Iron-On Heat Transfer Vinyl, I was struck by how sleek and matte it looks. The 12-inch width feels substantial but manageable, and the black color is deep and consistent across the entire roll.
The texture is smooth, almost velvety, which makes me feel confident it’ll press evenly onto my fabric projects.
Handling it, I noticed how lightweight it is, yet it feels durable. The clear, heat-resistant backing is a game-changer—it’s easy to see through, so lining up your design is straightforward.
I appreciated how the backing peels away cleanly after pressing, with no frustrating residue or tearing.
I went ahead and pressed a simple design onto a cotton tote. The instructions for heat and time were clear, and I liked the slightly glossy finish it achieved.
It adhered smoothly without any bubbling or wrinkles, and the press was even thanks to the backing’s stability. It felt secure after just one press, and the transfer looked sharp and professional.
What really stood out is how long-lasting it is. After a few washes, the design is still perfect—no peeling or cracking.
That’s a huge plus if you’re making personalized gifts or apparel you want to hold up over time.
On the downside, the roll isn’t as thick as premium options, so for intricate cuts, you might need to be precise with your blade settings. Also, at $9.99, it’s a fantastic value, but the shorter length means it’s best for small projects or occasional use rather than bulk production.
What Is Iron On Transfer and How Does It Work?
Iron on transfer, also known as heat transfer vinyl or heat transfer paper, is a method used to apply designs, graphics, or text onto fabric surfaces using heat and pressure. This process involves printing a design onto a special transfer paper or vinyl, which is then placed on the fabric and adhered using a heat press or an iron.
According to the Craft and Hobby Association, iron on transfers are popular among crafters and DIY enthusiasts due to their versatility and ease of use. The ability to create custom designs makes this technique appealing for personal and commercial applications alike.
Key aspects of iron on transfer include the type of transfer material used, the printing method, and the application technique. Transfer materials can vary from printable heat transfer vinyl to traditional transfer paper suitable for inkjet or laser printers. The printing method is crucial as it determines the quality of the design; for instance, sublimation printing yields vibrant colors but requires polyester fabrics. The application technique is equally important; using a heat press typically provides more consistent results compared to an iron, which may lead to uneven heat distribution.
This method has significant impacts on various industries, including fashion, promotional products, and home decor. It allows for personalization of clothing, making it popular for custom t-shirts, sports uniforms, and even home furnishings. According to Statista, the global custom apparel market was valued at approximately $3 billion in 2021, with iron on transfers playing a significant role in this growth.
The benefits of using iron on transfers include the ability to produce high-quality, durable designs that withstand washing and wear. This process is cost-effective for small runs, making it accessible for small businesses and hobbyists. Additionally, the ease of application means that individuals can create customized items without the need for professional equipment or extensive training.
To achieve the best results for iron on transfer, several best practices should be followed. First, ensure the fabric is clean and prepped, as dirt or moisture can affect adhesion. Second, use the correct temperature and pressure according to the manufacturer’s instructions, as this varies by material. Finally, allow the transfer to cool appropriately before peeling off the backing to prevent lifting or damage to the design.
What Types of Materials Are Ideal for Iron On Transfers?
The best materials for iron-on transfers enhance adhesion and ensure durability.
- Cotton: This natural fiber is highly absorbent and provides a strong base for iron-on transfers. The smooth texture allows for even heat distribution, ensuring that the transfer adheres well and lasts through multiple washes.
- Polyester: A synthetic fabric that is resistant to shrinking and stretching, polyester is excellent for iron-on transfers as it can withstand higher temperatures without damage. It also holds vibrant colors well, making it ideal for detailed designs.
- Blends (Cotton/Polyester): Fabrics that are a mix of cotton and polyester combine the best of both worlds, offering durability and comfort. These blends typically allow for good adhesion and are less prone to fading compared to 100% cotton fabrics.
- Canvas: This heavy-duty fabric is suitable for projects requiring a robust surface, such as tote bags or home décor items. The texture of canvas helps grip the transfer, ensuring it remains in place even after extensive use.
- Denim: The sturdy nature of denim makes it a great choice for iron-on transfers, especially for apparel like jackets and jeans. The thick fibers provide a solid base, allowing for a secure application of transfers that can endure wear and tear.
- Leather and Faux Leather: Both materials can work for iron-on transfers, but require special techniques to avoid damage. Applying transfers to leather typically requires lower heat settings and careful pressure to ensure a successful bond.
- Performance Fabrics: These are often used in sportswear and are designed to wick moisture away. While they can be challenging due to their synthetic nature, certain high-quality performance fabrics can yield excellent results if the appropriate transfer type and heat settings are used.
Which Heat Transfer Methods Result in the Best Finish?
Proper Temperature Control: Each type of iron-on transfer has specific temperature requirements; adhering to these guidelines is crucial. Too high a temperature can scorch the fabric or ruin the transfer, while too low a temperature can lead to incomplete adhesion, negatively impacting the durability and appearance of the final product.
Cooling Time Consideration: After applying heat, it is important to allow the transfer to cool before peeling off the backing. This cooling period helps to set the transfer better into the fabric, resulting in a stronger bond, which leads to a more resilient and visually appealing finish.
How Can You Achieve the Best Results When Applying Iron On Transfers?
To achieve the best results for iron on transfers, several key practices should be followed:
- Choose the Right Material: Selecting the correct fabric for your iron-on transfer is crucial. Natural fibers like cotton or blends that include polyester generally work best, as they can withstand higher temperatures and provide a better adhesion surface.
- Preheat Your Iron: Ensuring your iron is set to the appropriate temperature before application is vital. Most transfers require a medium to high heat setting without steam, as steam can interfere with the adhesive process and lead to poor results.
- Prepare the Fabric Surface: Before applying the transfer, it’s important to pre-wash and iron the fabric to remove any wrinkles or contaminants. This helps create a smooth surface for the transfer and ensures better adhesion.
- Use a Protective Sheet: Placing a Teflon sheet or parchment paper over the transfer while applying heat can protect both the transfer and your iron. This prevents direct contact and reduces the risk of scorching or damage to the design.
- Apply Even Pressure: When pressing the iron down, make sure to apply even pressure across the entire transfer area. This ensures that the heat and adhesive bond uniformly, which is essential for a long-lasting application.
- Follow Cooling Instructions: Allowing the transfer to cool completely before peeling off the backing is crucial. This helps to avoid lifting or damaging the design, ensuring a cleaner finish and better durability.
- Test on a Scrap Piece: If you’re uncertain about how a transfer will behave, testing on a scrap piece of the same fabric can save you from potential mistakes. This allows you to adjust temperature settings and application techniques as needed before the final application.
What Are the Essential Steps to Follow for Optimal Application?
To achieve the best results for iron on transfer, certain essential steps must be followed.
- Choose the Right Material: Selecting the appropriate fabric is crucial as not all materials respond well to heat. Cotton and polyester blends are ideal, while fabrics like nylon or 100% silk may not withstand the heat required for the transfer.
- Pre-Wash the Fabric: Washing the fabric before applying the transfer can remove any chemicals or finishes that might interfere with adhesion. Additionally, this helps to prevent shrinking or warping that can occur after the transfer is applied.
- Use a Clean and Flat Surface: A smooth, flat surface is essential for even pressure during the transfer process. Ensure that the work area is clean to avoid any dust or debris from affecting the transfer quality.
- Set the Correct Temperature: Each transfer material has a recommended temperature setting, usually indicated on the packaging. Using the right temperature ensures that the transfer adheres properly without damaging the fabric.
- Apply Even Pressure: When using an iron, it’s important to apply consistent and even pressure across the transfer. This ensures that all parts of the design adhere well and prevents any peeling or lifting after application.
- Follow Timing Guidelines: Each transfer requires a specific amount of time to set properly, which is typically mentioned in the instructions. Timing is critical; too short may prevent adhesion, while too long can scorch the fabric.
- Allow to Cool Before Peeling: Let the transfer cool down completely before peeling off the backing. This cooling period allows the adhesive to set properly, ensuring that the design remains intact when the backing is removed.
- Consider a Protective Layer: Using a piece of parchment paper or a pressing cloth over the transfer can protect it during the heat application. This additional layer helps prevent direct contact with the iron, reducing the risk of scorching.
What Common Mistakes Should You Avoid When Using Iron On Transfers?
To achieve the best results for iron on transfers, it’s essential to avoid certain common mistakes:
- Poor Heat Settings: Using the wrong temperature can lead to transfers that don’t adhere properly or that scorch the material. Always refer to the transfer paper instructions for the recommended heat setting, as different materials and types of transfers may require specific temperatures for optimal results.
- Insufficient Pressure: Applying too little pressure can result in incomplete adhesion, causing the transfer to peel or lift over time. Ensure that you apply firm and even pressure with the iron or heat press, allowing the transfer to bond effectively with the fabric.
- Skipping Pre-Pressing: Neglecting to pre-press the fabric can trap moisture and wrinkles that interfere with the transfer process. Pre-pressing the fabric for a few seconds helps create a smooth surface and removes any moisture, ensuring a better transfer outcome.
- Not Allowing Cool Down Time: Trying to peel the transfer off too soon can result in smudging or incomplete adhesion. It’s crucial to allow the transfer to cool down for the recommended time before removing the backing, as this helps set the transfer properly.
- Ignoring Fabric Compatibility: Using iron on transfers on unsuitable fabrics can lead to poor results, as certain materials may not hold the transfer well. Always check the compatibility of the fabric with the type of transfer you are using to ensure durability and adherence.
- Forgetting to Protect the Transfer: Failing to use a protective sheet or parchment paper can expose the transfer to direct heat, which may cause damage. Placing a protective layer over the transfer before applying heat helps safeguard it and ensures an even application of heat across the surface.
- Not Following Instructions: Each transfer type comes with specific instructions that must be followed for the best results. Skipping any steps or misinterpreting the guidelines can lead to disappointing outcomes, so it’s essential to read and adhere to all provided instructions carefully.
How Do You Care for Iron On Transfers After Application?
To achieve the best results for iron on transfer after application, it is essential to follow specific care instructions.
- Wait Before Washing: Allow the transfer to cure for at least 24 hours before washing.
- Wash in Cold Water: Use cold water to wash items with iron on transfers to prevent fading and damage.
- Avoid Bleach: Do not use bleach or fabric softeners, as these can deteriorate the adhesive quality of the transfer.
- Turn Inside Out: Always turn the garment inside out before washing to protect the transfer from friction and abrasion.
- Use Gentle Cycle: Opt for a gentle cycle on your washing machine to minimize wear on the transfer.
- Air Dry: Air drying is preferable, as high heat from a dryer can shrink the transfer and cause it to crack.
- Iron Carefully: If you need to iron the garment, place a cloth over the transfer to avoid direct contact, and use a low heat setting.
Waiting before washing allows the transfer to bond properly with the fabric, ensuring longevity.
Washing in cold water helps maintain the integrity of the transfer, preventing it from peeling or fading prematurely.
Avoiding bleach is important because it can break down the adhesive and colors, reducing the lifespan of the transfer.
Turning garments inside out during washing protects the transfer from rubbing against other items, which can cause wear and tear.
Using a gentle cycle minimizes agitation that could damage the transfer, allowing it to remain intact longer.
Air drying is gentler than using a dryer, which can subject the transfer to high temperatures that may cause it to lose adhesion or crack.
When ironing, protecting the transfer with a cloth and using low heat ensures that it is not damaged by direct heat exposure.
What Tips Help Ensure Longevity of Iron On Transfers?
To achieve the best results for iron-on transfers and ensure their longevity, consider the following tips:
- Use High-Quality Transfers: Opt for transfers that are specifically designed for your fabric type and intended use. High-quality transfers tend to adhere better and last longer, reducing the chances of peeling or fading over time.
- Preheat Your Iron: Make sure your iron is set to the appropriate temperature before applying the transfer. A preheated iron helps to activate the adhesive more effectively, ensuring a strong bond between the transfer and the fabric.
- Press Firmly and Evenly: Apply consistent pressure over the entire transfer area for the recommended time. This ensures that the transfer adheres properly and evenly, preventing any lifting or bubbling at the edges.
- Cool Before Peeling: Allow the transfer to cool completely before peeling off the backing. This cooling period helps the adhesive to set properly, which contributes to a stronger, longer-lasting bond.
- Wash Carefully: When washing garments with iron-on transfers, turn them inside out and use cold water. This minimizes friction and exposure to heat, which can cause the transfer to wear out more quickly.
- Avoid Direct Heat: Never place an iron directly on the transfer after it has been applied. Instead, use a protective sheet or parchment paper to shield the transfer from direct contact with the iron during any touch-ups.
- Store Properly: When not in use, store items with iron-on transfers in a cool, dry place, away from direct sunlight. Proper storage helps prevent fading and damage from environmental factors.