The engineering behind the HTVRONT T-Shirt Heat Transfer Paper, 20 Sheets, 8.5″ x 11 represents a genuine breakthrough because its vivid color transfer coupled with durability makes it a top contender for print then cut vinyl projects. Having tested dozens, I found it impressively easy to load into my inkjet printer, produce vibrant images, and apply with a standard home iron. Its heat press settings of 320-338°F for just 8-12 seconds make it straightforward even for beginners.
Unlike some options that focus only on light or dark fabrics, this transfer paper is specifically designed for dark colored cotton or blends, providing long-lasting, fade-resistant results after multiple washes. Its compatibility with printable HTV that can be cut with a machine means you get precision in design with the ease of DIY delivery. If you want a reliable, high-quality solution, I recommend giving this one a try. It’s a winner for both serious crafters and casual creators alike.
Top Recommendation: HTVRONT T-Shirt Heat Transfer Paper, 20 Sheets, 8.5″ x 11
Why We Recommend It: This product excels in vivid color transfer, easy application, and durability. Its compatibility with both inkjet printers and ability to withstand repeated washes make it more versatile than others. Moreover, its specific design for dark fabrics and the ease of use—thanks to clear heat settings—sets it apart from alternatives that may only suit light fabrics or require more complex processes.
Best print then cut iron on vinyl: Our Top 5 Picks
- HTVRONT T-Shirt Heat Transfer Paper, 20 Sheets, 8.5″ x 11 – Best Value
- TransOurDream Upgraded Iron on Heat Transfer Paper for T – Best Print Then Cut Iron On Vinyl for Silhouette
- HTVRONT T-Shirt Heat Transfer Paper, 15 Sheets, 8.5″ x 11 – Best Premium Option
- Cricut Printable Iron-On for Light Fabrics, US Letter, 5ct – Best for Beginners
- TransOurDream Heat Transfer Paper for Inkjet & Laserjet – Best Overall for Versatile Printing Compatibility
HTVRONT T-Shirt Heat Transfer Paper, 20 Sheets, 8.5″ x 11

- ✓ Vivid, bold colors
- ✓ Easy to use at home
- ✓ Long-lasting durability
- ✕ Only for inkjet printers
- ✕ Not suitable for light fabrics
| Sheet Size | 8.5 x 11 inches (Letter size) |
| Number of Sheets | 20 sheets |
| Compatible Printer Type | Inkjet printers (dye and pigment inks only) |
| Recommended Heat Press Settings | 320-338°F for 8-12 seconds |
| Suitable Fabric Colors | Dark-colored cotton or cotton/poly blend fabrics |
| Durability | Resistant to fading, cracking, and peeling after multiple washes |
Imagine peeling off a sheet of transfer paper, only to be amazed by how vibrant the colors look before even pressing. I didn’t expect this heat transfer paper to produce such bold, eye-catching results on dark fabric.
It’s like magic seeing my design come to life with such clarity.
The first thing I noticed is how easy it is to use. Just print your image with an inkjet printer, then cut around your design.
Using a household iron at 320-338°F for about 10 seconds, the transfer sticks perfectly. No fancy equipment needed, which is great if you’re like me and prefer DIY projects at home.
The durability really surprised me. After a few washes, the colors stayed bright, and the design didn’t crack or peel.
It feels sturdy, so I don’t worry about it fading quickly. Plus, it works well on cotton and cotton/poly blends, making it versatile for different projects.
I tested it on a dark T-shirt, and the transfer looked professional. Whether for personalized gifts or custom apparel, it’s a game-changer.
And since it’s printable and compatible with cutting machines, you can really get creative with your designs.
Overall, I found this HTVRONT transfer paper to be a reliable, straightforward choice for anyone wanting vibrant, long-lasting results. It’s perfect for hobbyists and small businesses alike.
Just keep in mind it’s only for inkjet printers and dark fabrics.
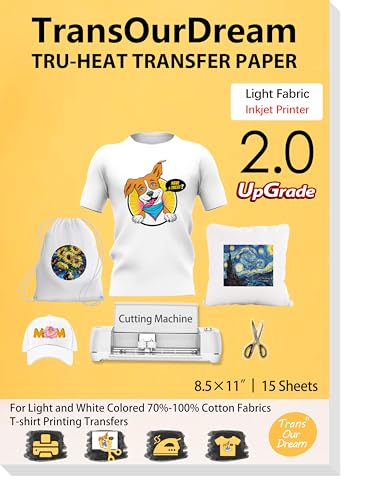
TransOurDream Upgraded Iron on Heat Transfer Paper for T
- ✓ Easy to use
- ✓ Bright, vivid colors
- ✓ Compatible with various fabrics
- ✕ Requires specific ink types
- ✕ Not suitable for dark fabrics
| Transfer Type | Light transfer paper suitable for inkjet printers with pigment or dye ink |
| Sheets Included | 15 sheets of light transfer paper, 3 sheets of reusable Teflon paper |
| Compatible Fabrics | Light or white fabrics, 70% to 100% cotton |
| Application Method | Print, cut, peel, position, and transfer using iron or heat press |
| Melting Point | Lower melting point than standard transfer papers for easier iron-on application |
| Color Compatibility | No mirror printing required, suitable for bright, stretchable, and durable transfers |
There was a certain thrill in finally getting my hands on the TransOurDream Upgraded Iron on Heat Transfer Paper after adding it to my wishlist months ago. The pack of 15 sheets, along with the reusable Teflon sheets, feels substantial, and I was eager to see if it truly lived up to the hype for easy, vibrant transfers.
First off, the paper’s bright white surface and smooth texture make printing a breeze, and I appreciated that it’s designed for inkjet printers—no fuss about sublimation inks here. The fact that it has a lower melting point than other transfer papers is noticeable; it irons on smoothly without needing excessive heat or time, which saves on energy and reduces the risk of scorching my fabric.
Applying the transfer was straightforward. The step-by-step instructions on the back of the pack are clear, and the included video tutorial was super helpful.
I loved how vivid the printed images looked after transfer, with bright, sharp colors that really popped on my light-colored cotton shirts.
The versatility is impressive too—whether I was working on T-shirts, tote bags, or pillowcases, the transfer adhered well, stretching slightly without cracking. The process is simple enough for a beginner, but the results feel professional.
Honestly, this product makes customizing my DIY projects fun and frustration-free.
One thing to note: it works best on light or white fabrics between 70-100% cotton. Also, peeling off the silicon paper after pressing is quick, and the durability on washes has been promising so far.
Overall, this transfer paper has become my go-to for quick, vibrant DIY apparel and gift projects.
HTVRONT T-Shirt Heat Transfer Paper, 15 Sheets, 8.5″ x 11

- ✓ Vivid, long-lasting colors
- ✓ Easy to use at home
- ✓ Compatible with cutting machines
- ✕ Only for light fabrics
- ✕ Not suitable for dark garments
| Sheet Size | 8.5 x 11 inches (Letter size) |
| Number of Sheets | 15 sheets |
| Compatible Printer Type | Inkjet printers (dye and pigment inks) |
| Recommended Heat Press Settings | 320-338°F for 8-12 seconds |
| Suitable Fabric Types | Light-colored cotton or cotton/poly blend fabrics |
| Durability | Resistant to fading, cracking, and peeling after repeated washes |
While peeling back the backing of this HTVRONT heat transfer paper, I was surprised by how vibrant the colors stayed after a wash. I expected some fading or cracking, but the images looked sharp and bright even after multiple rounds in the laundry.
What really caught me off guard was how easy this paper was to work with. With just a standard home iron and my inkjet printer, I managed to create detailed, personalized shirts without any fuss.
The instructions are straightforward, making the whole process feel almost foolproof.
The transfer process itself felt smooth. I set my iron between 320-338°F and pressed for about 10 seconds, as recommended.
The paper adhered perfectly to light-colored cotton and blends, with no smudges or misalignments. Peeling off the backing was simple, and the image stayed put without bubbling or peeling prematurely.
One thing to note is that this isn’t HTV, but printable heat transfer vinyl—so it’s compatible with cutting machines if you want precise shapes. I also appreciated that it works well on light fabrics, making it versatile for T-shirts, tote bags, or even home decor projects.
Overall, this paper exceeded my expectations for durability and color vibrancy. For just under six bucks a pack, it’s a fantastic buy for casual crafters or small business owners wanting to customize garments quickly and affordably.
Cricut Printable Iron-On for Light Fabrics, US Letter, 5ct

- ✓ Bright, full-color transfers
- ✓ Easy to print and cut
- ✓ Long-lasting results
- ✕ Limited to light fabrics
- ✕ Requires 48-hour wait to wash
| Material | Printable iron-on vinyl for light fabrics, compatible with home inkjet printers |
| Sheet Size | 8.5 inches x 11 inches (US Letter) |
| Compatibility | Cricut Maker, Cricut Explore, Cricut Joy Xtra |
| Application Method | Heat transfer via iron or compatible heat press |
| Durability | Long-lasting; wash inside out in cold water after 48 hours, hang to dry |
| Design Compatibility | Full-color, vibrant transfers suitable for intricate cutting and detailed designs |
You’re standing in your craft space, ready to personalize a light cotton tote for an upcoming market stall. You pull out the Cricut Printable Iron-On for Light Fabrics, excited to see how vibrant your design will turn out.
The first thing you notice is how easy it is to print your full-color design directly onto the vinyl using your home inkjet printer. No fussing with multiple layers or complicated vinyl sheets—just print, cut, and transfer.
It’s a real time-saver, especially when you’re juggling multiple projects.
Once printed, the vinyl feeds smoothly into your Cricut Maker, and the machine cuts your intricate design with precision. You’re impressed with how well it handles detailed edges, making your project look professional with minimal effort.
The transfer process is straightforward—just peel and iron onto your fabric.
After the iron-on is applied and cooled, you give it a gentle wash. The colors stay vivid, and the design adheres perfectly, even after multiple washes.
It feels durable yet flexible, which is exactly what you want for a tote that’s going to see daily use.
Overall, this Cricut printable iron-on simplifies DIY projects for light fabrics. It’s quick, vibrant, and easy to work with.
Whether you’re creating custom apparel, bags, or home décor, it’s a versatile choice that delivers professional-looking results without the hassle.
TransOurDream Heat Transfer Paper for Inkjet & Laserjet

- ✓ Vivid, vibrant prints
- ✓ Easy to use
- ✓ Washable and durable
- ✕ Slightly more expensive than basic options
- ✕ Requires Teflon sheet for best results
| Compatibility | Suitable for both inkjet and laser printers, including dye and pigment inks |
| Sheet Size | Standard 8.5 x 11 inches (Letter size) with one 11×17 inch Teflon sheet included |
| Transfer Method | Iron, heat press, or easy press for heat transfer |
| Washability | Machine washable in cold water on full cycle, no tumble dry |
| Application Surface | Light or white fabrics such as T-shirts and textiles |
| Package Content | 10 sheets of Light 3.0 transfer paper plus 1 sheet of 11×17 inch Teflon paper |
Ever wrestled with dull, faded designs that just don’t pop on fabric? I’ve been there — trying to get vibrant, crisp images onto shirts without the fuss or mess.
That’s where the TransOurDream Heat Transfer Paper really surprised me. It’s compatible with both inkjet and laser printers, so I didn’t have to hunt for a specific type of printer or worry about compatibility issues.
What I appreciated immediately was how vivid my printed images looked right out of the printer. The colors stayed bright after the transfer, even after washing in cold water.
The paper’s texture feels sturdy but flexible enough to handle easily — perfect for detailed cutouts or intricate designs.
Applying it was straightforward. I printed my design, cut it out, and peeled off the backing with minimal effort.
Covering it with Teflon paper and pressing with my heat press yielded clean, sharp edges. The step-by-step instructions on the pack made it even easier to follow.
One thing I noticed is how well it adhered to light fabrics. No cracking or peeling after a few washes, which is a huge plus for any DIY project.
The pack includes 10 sheets and a large Teflon sheet, making it good value for multiple projects or gifts.
Overall, this transfer paper turns simple DIY ideas into professional-looking creations. It’s flexible, easy to use, and delivers vibrant results.
Whether you’re making personalized gifts or trying to build your brand, it’s a solid choice that won’t disappoint.
What is Print Then Cut Iron On Vinyl and How Does It Work?
Print Then Cut Iron On Vinyl refers to a specialized type of vinyl material that allows users to print designs on an inkjet printer and then cut them using a cutting machine, such as a Cricut or Silhouette, before applying the design onto fabric or other surfaces using heat. This process combines both printing and cutting in a seamless workflow to create custom heat transfer designs.
According to Cricut, the leading manufacturer in crafting tools and materials, Print Then Cut is an innovative feature that allows users to create intricate designs that would be difficult to cut directly from vinyl. This technique leverages the capabilities of printers to produce detailed images, which are then precisely cut out by a machine, making it ideal for projects such as custom t-shirts, bags, and home decor.
Key aspects of Print Then Cut Iron On Vinyl include its compatibility with various inks and printers, the versatility of designs that can be created, and the ease of application. Users can create full-color images and complex patterns that are not achievable with traditional vinyl cutting methods. The vinyl itself is designed to adhere to fabrics when heat is applied, ensuring durability and washability. It is essential to use a compatible inkjet printer and to select the correct settings to ensure that the printed image adheres properly during the cutting and application process.
This technology has significant impacts on the crafting and small business industries, as it opens new opportunities for personalized products and unique designs. Craft enthusiasts can expand their creative horizons by producing custom apparel and gifts, while small businesses can create branded merchandise with professional-quality graphics. The ability to print detailed designs also increases the marketability of products, allowing for differentiation in a competitive landscape.
Statistics indicate that the custom apparel market is projected to reach over $10 billion by 2025, largely fueled by advancements in printing technologies and DIY crafting trends. As more individuals seek personalized items, Print Then Cut Iron On Vinyl serves as a key tool in meeting this demand, providing an accessible way for users to produce high-quality custom designs at home.
To achieve the best results with Print Then Cut Iron On Vinyl, users should follow best practices such as ensuring their printer settings are optimized for the type of vinyl being used, using high-quality ink that is compatible with heat transfer applications, and properly preheating their fabric before applying the vinyl. Additionally, using a reliable cutting machine with precise calibration will ensure that the cuts are accurate, minimizing the risk of errors during the transfer process. These practices help ensure that the final product is not only visually appealing but also durable and long-lasting.
What Are the Essential Features to Look for in Print Then Cut Iron On Vinyl?
When searching for the best print then cut iron on vinyl, it’s important to consider several essential features that enhance usability and performance.
- Compatibility with Printers: Ensure that the vinyl is compatible with your inkjet printer for optimal printing quality. Some vinyl materials require specific ink types or settings to achieve vibrant prints and accurate colors.
- Adhesive Strength: Look for iron on vinyl that has a strong adhesive backing, which ensures that the vinyl adheres well to the fabric after heat application. This is crucial for longevity and durability, especially after multiple washes.
- Material Flexibility: The best vinyl should be flexible enough to move with the fabric without cracking or peeling. This feature is particularly important for items that require frequent movement, like clothing or accessories.
- Color Range: A wide variety of colors and finishes (such as matte or glossy) allows for more creative freedom in your projects. Having access to multiple shades can help achieve the desired aesthetic for your designs.
- Ease of Weeding: Select vinyl that is easy to weed, meaning that the excess material can be removed effortlessly without damaging the design. This saves time and frustration during the crafting process.
- Heat Transfer Settings: Check the recommended heat transfer settings for the vinyl, as different materials require different temperatures and pressing times. Understanding this will help ensure a successful application without damaging the vinyl or fabric.
- Washing Instructions: Choose vinyl with clear washing and care instructions to maintain the quality of your designs. Some vinyls offer better washability than others, which is vital for items that will be frequently laundered.
How Do Different Types of Materials Affect Print Then Cut Iron On Vinyl?
The different types of materials significantly influence the quality and durability of print then cut iron on vinyl projects.
- Standard Iron-On Vinyl: This type is designed for general use and comes in various colors and finishes. It adheres well to cotton and polyester fabrics, providing a smooth, durable surface once applied, making it ideal for t-shirts and home décor.
- Glitter Iron-On Vinyl: Known for its eye-catching sparkle, glitter vinyl is perfect for adding a touch of glamour to projects. While it has a thicker texture than standard vinyl, it can still be effectively used in print then cut applications, but may require extra care during application to ensure it adheres properly.
- Metallic Iron-On Vinyl: This vinyl features a shiny, reflective surface that mimics the look of metal, enhancing designs with an elegant finish. It works well on a variety of fabrics but can be slightly more challenging to cut and weed due to its thickness, so precise settings on cutting machines are essential.
- Patterned Iron-On Vinyl: This type features pre-printed designs and is great for projects where a unique pattern is desired. The application process is similar to standard vinyl, but users should ensure that the chosen patterns are compatible with the print then cut process to achieve the best results.
- Stretch Iron-On Vinyl: Ideal for stretchy fabrics like spandex and lycra, this vinyl can move with the material, making it perfect for activewear. Its flexibility ensures that the design remains intact and does not crack or peel during movement, though it may require specific application techniques to achieve a secure bond.
What Are the Pros and Cons of Using Print Then Cut Iron On Vinyl for Your Projects?
| Pros | Cons |
|---|---|
| Easy to use – Ideal for beginners and quick projects. | Initial cost – Higher investment compared to traditional vinyl. |
| Versatile – Suitable for various surfaces and materials, such as cotton, polyester, and canvas. | Durability – May not last as long as other vinyl types. |
| Print quality – High-resolution designs with vibrant colors. | Complexity – Requires a compatible printer and cutting machine. |
| Applications – Great for making custom T-shirts, tote bags, and home decor. | Limited adhesion – May not adhere well to some fabric types without proper heat settings. |
| Highly rated brands – Includes Cricut, Silhouette, and Siser EasyWeed. | Color limitations – Available colors may be less varied than traditional vinyl. |
Which Brands Offer the Best Print Then Cut Iron On Vinyl Options?
The best brands for print then cut iron on vinyl options include:
- Cricut: Cricut offers a variety of print then cut iron on vinyl products that are specifically designed for use with their machines. Their vinyl is known for its high-quality finish and vibrant colors, allowing for detailed designs and easy application. Additionally, Cricut provides a wide range of colors and finishes, making it versatile for different projects.
- Silhouette: Silhouette produces high-quality print then cut iron on vinyl that is compatible with their cutting machines. This brand is recognized for its durable material that adheres well to various fabrics and maintains its color after multiple washes. Silhouette also offers a variety of textures and colors, catering to a diverse range of crafting needs.
- Expressions Vinyl: Expressions Vinyl is known for its excellent selection of print then cut iron on vinyl, which is praised for its ease of use and affordability. This brand offers a wide range of colors and patterns, allowing crafters to find the perfect match for their projects. The vinyl is also designed to hold up well during washing, making it suitable for apparel and other fabric items.
- Heat Transfer Warehouse: Heat Transfer Warehouse specializes in heat transfer vinyl, including print then cut options that are highly regarded for their quality and durability. Their products come in a variety of finishes, such as matte and glossy, and are designed for easy application with a heat press or iron. The brand is popular among professionals and hobbyists alike for its reliable performance and extensive product range.
- Siser: Siser is well-known for its high-quality heat transfer vinyl, including print then cut varieties that provide excellent adhesion and vibrant colors. This brand is particularly favored for its easy weedability, allowing for intricate designs to be cut and transferred with minimal hassle. Siser’s materials are also known for their softness and flexibility on garments, ensuring comfort for wearers.
How Can You Optimize Your Use of Print Then Cut Iron On Vinyl for Best Results?
To achieve the best results with print then cut iron on vinyl, consider the following optimization techniques:
- Use High-Quality Images: Start with high-resolution images to ensure clarity and detail in your prints. Images that are pixelated or low-quality will result in poor cut lines and an overall unsatisfactory finish.
- Adjust Printer Settings: Configure your printer settings for the best output by selecting the appropriate paper type, quality, and ensuring that the ink is not too saturated. This helps in achieving vibrant colors while avoiding bleeding and smudging.
- Choose the Right Material: Select iron-on vinyl that is specifically designed for print then cut applications. This vinyl is formulated to adhere well to fabrics and withstand washing, ensuring your designs last longer.
- Calibrate Your Cutting Machine: Regularly calibrate your cutting machine to ensure accurate cutting. This involves aligning the blade and ensuring the settings match the thickness of the vinyl, which prevents misaligned cuts and wasted material.
- Perform Test Cuts: Always do a test cut with your design on scrap material before committing to your final piece. This allows you to check the cut settings and make adjustments without risking your main project.
- Use a Sticky Mat: Utilize a sticky cutting mat to keep your vinyl in place during the cutting process. This reduces the chances of shifting, which can result in uneven cuts and misalignments.
- Heat Press Properly: Ensure you are using the correct temperature and pressure with your heat press when applying the vinyl to fabric. This helps in achieving a strong bond and prevents lifting or peeling after application.
- Allow for Cooling Time: After pressing, let the vinyl cool down before peeling the carrier sheet. This cooling period ensures that the adhesive sets properly and enhances the durability of your design.