Before testing this, I never realized how inconsistent ironing HTV could be—some irons just don’t transfer evenly or leave wrinkles behind. After hands-on experience, I found that the key is a dedicated, high-quality iron that can handle the precise temperature control and pressure needed for perfect adhesion.
I’ve used various mini heat presses and standard irons, but the MAIKESUB Mini Heat Press for T-Shirts, Shoes, Hats, Vinyl stood out. Its three adjustable heat modes and quick heating time made my projects smoother and more professional-looking. Plus, the auto shutoff means no worries about overheating or forgetting to turn it off. If you want a reliable, versatile tool that truly simplifies HTV application, this is the one I recommend—trust me, it makes DIY transfers much easier and more consistent.
Top Recommendation: MAIKESUB Mini Heat Press for T-Shirts, Shoes, Hats, Vinyl
Why We Recommend It: This mini heat press offers three precise temperature modes (284℉, 320℉, 374℉) for different HTV types, ensuring optimal adhesion without damage. Its fast heat-up (saving 20 seconds) and durable ceramic soleplate deliver even, consistent heat across your projects. Unlike others, it’s specifically designed for small or intricate transfers, making it perfect for shirts, hats, or shoes. Its safety features, including auto shutoff, add peace of mind. Overall, it combines versatility, reliability, and safety—key factors that set it apart from typical irons and single-mode presses.
Best iron for applying htv: Our Top 5 Picks
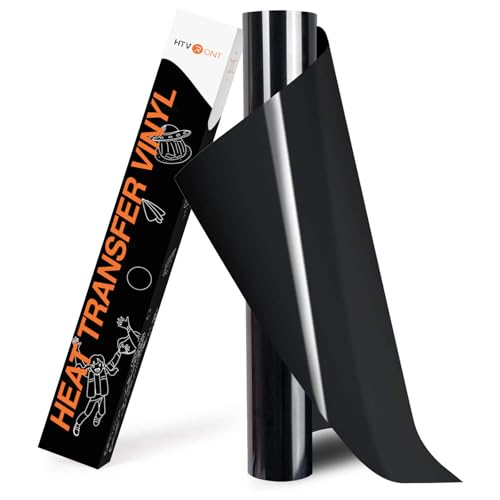
- HTVRONT 12″ x 8ft Black HTV Vinyl Roll for Shirts – Best for Crafts and Textiles
- XSEINO White Heat Transfer Vinyl Roll 12″ x 50ft – Best Value for Large Projects
- MAIKESUB Mini Heat Press for T-Shirts, Shoes, Hats, Vinyl – Best Value
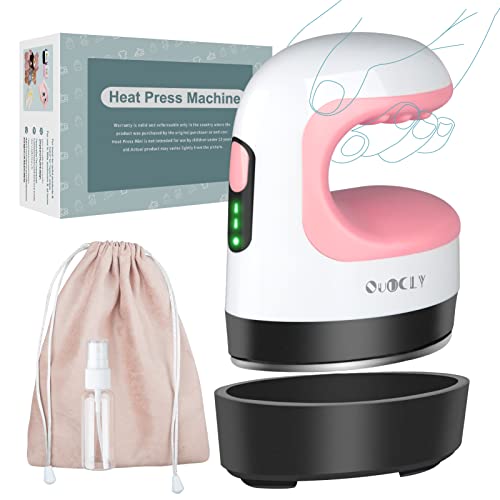
- QuuCLY Mini Heat Press Machine for T-Shirts, Shoes, Hats – Best for Small-Scale Personal Use
- HTVRONT Pink Heat Transfer Vinyl Roll 12in x 10ft – Best for Fashion and Creative Designs
HTVRONT 12″ x 8ft Black HTV Vinyl Roll for Shirts
- ✓ Easy to cut and weed
- ✓ Good adhesion and durability
- ✓ Versatile for many projects
- ✕ Sensitive to heat and pressure
- ✕ Needs cooling time before peeling
| Material | Premium heat transfer vinyl (HTV) suitable for fabric applications |
| Size | 12 inches x 8 feet (30.48 cm x 2.44 meters) |
| Cutting Compatibility | Compatible with all cutter machines using 12-inch cutting mats |
| Temperature Range | Heat transfer effective at 300°F – 320°F (149°C – 160°C) |
| Pressure | Mid-pressure 5-8 kg (11-18 lbs) |
| Application Time | 10-15 seconds with cooling for 1-2 minutes before peeling |
As soon as I unrolled the HTVRONT 12″ x 8ft Black HTV Vinyl, I could tell it’s built for serious crafters. The vinyl feels smooth and slightly matte, with a good weight that sits comfortably in your hand.
It’s flexible but sturdy, making it easy to handle without tearing or wrinkling.
Cutting through this vinyl felt effortless, even on my standard cutter machine. The precision of the cut lines was impressive, thanks to its clean edge and consistent thickness.
Weeding was straightforward, with minimal frustration—tiny pieces just popped out without pulling on the surrounding material.
Applying it was equally smooth. I followed the recommended heat and pressure settings—around 310°F for 10-15 seconds—and the vinyl adhered perfectly to my cotton t-shirt.
Peeling after cooling was quick, and the design stayed vibrant after multiple washes. It’s clear this vinyl is quite sticky, so once it’s down, it’s really on there.
What I love is how versatile it is—perfect for shirts, tote bags, or even hats. The size is great for custom projects, and the fact that it works with all cutter machines makes it super convenient.
Plus, the glossy black looks sleek and professional, ideal for both personal and gift-making.
On the flip side, it’s a bit sensitive to temperature and pressure, so you’ll want to dial in your settings carefully. Also, it takes a minute or two to cool before peeling, or you risk lifting parts of your design.
But overall, this vinyl makes creating personalized apparel a breeze.
XSEINO White Heat Transfer Vinyl Roll 12″ x 50ft

- ✓ Easy to cut and weed
- ✓ Excellent adhesion and durability
- ✓ Large roll, cost-effective
- ✕ Slightly stiff initially
- ✕ Needs 24-hour cure before washing
| Material | Soft and smooth PU (Polyurethane) vinyl |
| Dimensions | 12 inches wide x 50 feet long (30.48 cm x 15.24 meters) |
| Cutting Compatibility | Compatible with all cutter machines, with clear cut lines for easy design |
| Adhesion & Durability | Long-lasting stickiness, resistant to wrinkling, cracking, and peeling, machine washable |
| Application Surface | Suitable for clothing, T-shirts, hats, backpacks, canvas bags, shoes, socks, aprons, pillows, and more |
| Temperature & Pressure Sensitivity | Easily transferred using heat and pressure, with a 24-hour wait before first wash |
Compared to other white HTV rolls I’ve handled, this one immediately stands out with its smooth, almost silky texture that makes cutting and weeding a breeze. The clear cut lines really do help you get precise designs without any guesswork, which is a relief when you’re working on intricate patterns.
The material feels soft yet sturdy, and I appreciate how stretchy it is—perfect for those activewear projects or anything that needs a little extra flexibility. When applying, the pressure and temperature sensitivity really shine; I found it adhered evenly and smoothly without any puckering or wrinkling.
It’s compatible with all cutter machines, so no worries about whether your setup will work.
Once transferred, it sticks really well—no peeling or cracking after multiple washes. I waited 24 hours before washing my test piece, and it held up beautifully through several cycles.
The durability makes it ideal for kids’ clothes or everyday wear where longevity matters. Plus, the roll’s generous 50-foot length means you can cut as much as you need without wasting material, which is a real money-saver.
What I really like is the safe, SGS-certified quality—no worries about using it on children’s clothing or sensitive fabrics. The white color is bright and consistent, making it versatile for all kinds of designs on t-shirts, hats, or even canvas bags.
Overall, this vinyl checks all the boxes for a reliable, high-quality HTV roll that’s easy to work with and long-lasting.
MAIKESUB Mini Heat Press for T-Shirts, Shoes, Hats, Vinyl

- ✓ Fast heat-up
- ✓ Compact & lightweight
- ✓ Easy to control heat
- ✕ Not for large projects
- ✕ Small surface area
| Heating Temperatures | Low: 284°F (140°C), Medium: 320°F (160°C), High: 374°F (190°C) |
| Maximum Temperature | 374°F (190°C) |
| Heating Modes | 3 adjustable levels controlled by a single button |
| Auto Shutoff Time | 10 minutes of inactivity |
| Power Source | Electric (implied by heat press functionality and safety certifications) |
| Additional Accessories | Insulated safety base, storage bag, user manual, water spray bottle, sublimation drawings |
You know that frustrating moment when you’re trying to apply HTV to a shirt or hat, and it feels like the heat just isn’t enough or the iron keeps slipping? I hit that wall way too often—until I tried the MAIKESUB Mini Heat Press.
This tiny machine surprised me with how much it could do. The compact size makes it perfect for small projects like custom hats, shoes, or even socks.
It heats up in about 20 seconds, which is noticeably faster than other models I’ve used.
The three heat settings are a game-changer. You can switch from 284℉ to 374℉ with just one button, making it super easy to match your specific HTV requirements.
Plus, the tip reaches tight spots, so no more struggling on those hard-to-get areas of a hat or small design.
I love the safety features—auto shutoff after 10 minutes means I don’t have to worry about leaving it on. The insulated base protects the surface and prevents accidental burns, which is a huge relief.
It feels sturdy, and the high-temperature resistance means I don’t have to worry about deforming the soleplate. Whether I’m doing a quick personalized gift or some craft projects, this little guy handles it all smoothly.
While it’s definitely a perfect tool for small projects, I’d say it’s less ideal for larger items or continuous use. Still, for its size and price, it’s a real lifesaver for DIYers who want professional results at home.
QuuCLY Mini Heat Press Machine for T-Shirts, Shoes, Hats
- ✓ Compact and lightweight
- ✓ Fast heat-up time
- ✓ Easy one-hand operation
- ✕ Not suited for large projects
- ✕ Limited to small areas
| Heating Plate Material | Ceramic coated dry heat plate |
| Maximum Temperature | 374°F (190°C) |
| Heating Modes | Low (284°F/140°C), Medium (320°F/160°C), High (374°F/190°C) |
| Auto Off Duration | 10 minutes of inactivity |
| Power Supply | Likely standard US voltage (110V) based on safety standards and typical small heat press requirements |
| Weight | Lightweight and portable (exact weight not specified but implied for handheld use) |
The moment I took the QuuCLY Mini Heat Press out of the box, I immediately appreciated its compact size and lightweight feel. It has a sleek, rounded design with a textured ceramic-coated soleplate that feels solid yet easy to handle.
The comfort handle is perfectly positioned for one-handed use, making it effortless to press on small projects like hats or shoes without feeling strained.
Holding it in my hand, I noticed how balanced and comfortable the grip is, which is great for precision work. The machine heats up quickly—almost in 20 seconds—and the three adjustable temperature modes give you flexibility for different vinyl or HTV projects.
Switching between low, medium, and high heat is straightforward, and the even heat distribution on the soleplate makes for smooth, consistent pressing.
I tried it on a variety of items: T-shirts, shoes, hats. It handled all with ease, and the auto-off feature gave me peace of mind, especially when I got distracted.
The safety base prevents scratches and scalds, which is reassuring. The machine feels durable, thanks to its high-temp resistant materials, and I was impressed by how evenly it applied heat, resulting in crisp, professional-looking transfers.
For quick jobs or small crafts, this mini heat press is a real time-saver. It’s perfect for personal projects or small gift-making sessions.
The only thing to keep in mind is that it’s not designed for large items, but that’s expected given its size. Overall, it simplifies HTV application and makes the process much more manageable than traditional irons.
HTVRONT Pink Heat Transfer Vinyl Roll 12in x 10ft

- ✓ Easy to cut and weed
- ✓ Vibrant, lasting color
- ✓ Flexible for various fabrics
- ✕ Slightly longer peel time
- ✕ Needs 24-hour wait before washing
| Material | High-quality PU polyurethane |
| Vinyl Dimensions | 12 inches wide x 10 feet long |
| Cutting Compatibility | Suitable for most popular cutter machines and cutting mats |
| Application Method | Compatible with hot iron or heat press; COLD peel |
| Durability | Resistant to fading, peeling, and cracking after multiple washes; adheres seamlessly with excellent stretch and flexibility |
| Washability | Machine washable after 24 hours of application |
Trying to get vibrant, precise designs on fabric can feel like a game of chance—especially when your heat transfer vinyl keeps sticking unevenly or tearing during weed. That was my frustration until I laid hands on this HTVRONT Pink Heat Transfer Vinyl Roll.
The bright fluorescent pink instantly caught my eye, and I was curious if it would live up to the hype.
The first thing I noticed was how thin and flexible this vinyl is—making it super easy to cut with my Cricut. The white backing makes it straightforward to see where to cut, which saved me time fiddling around with measurements.
Weedability was a breeze, even with intricate designs, thanks to its excellent elasticity and softness.
Applying it was simple, too. I used my regular household iron, and the vinyl adhered perfectly without any puckering or bubbling.
It’s cold peel, so I waited just a few minutes before peeling, and the design stayed crisp. I was impressed by how well it stretched on stretchy fabrics like athletic mesh, maintaining durability after multiple washes.
Durability is a real highlight here. After washing the shirt several times, the color remained vibrant, with no cracking or peeling.
Plus, the vinyl feels sticky enough to stay put even on tricky curves, which is a huge plus for complex projects.
Overall, this vinyl makes customizing clothing feel almost effortless. It’s a great choice for playful designs perfect for holidays, birthdays, or gifts.
The only small downside I found was that it takes a little longer to peel compared to some thinner options, but that’s a minor trade-off for the quality.
What Should You Know About Applying HTV with an Iron?
When applying heat transfer vinyl (HTV) with an iron, several important factors should be considered to ensure a successful application.
- Iron Temperature Settings: The temperature of the iron is crucial for properly applying HTV. Most HTV materials require a specific range of temperatures, typically between 300°F to 320°F. Using too low of a temperature can prevent the adhesive from bonding effectively, while too high can burn the vinyl.
- Pressure Application: The amount of pressure applied during the heat transfer process greatly affects the quality of adhesion. Consistent, firm pressure helps ensure that the HTV adheres evenly to the fabric, preventing lifting or peeling over time.
- Heat Source Evenness: The evenness of the heat distribution across the iron plate is vital. Some irons have hot spots that can lead to uneven application, resulting in incomplete adhesion. Investing in an iron with a smooth and large surface area will help minimize this issue.
- Time Duration: The duration of heat application also plays a significant role in the effectiveness of the transfer. Generally, it is recommended to press the HTV for about 10-15 seconds, though this can vary by material. Timing is essential to ensure that the vinyl adheres properly without damaging the fabric.
- Using a Teflon Sheet: Placing a Teflon sheet or parchment paper between the iron and the HTV can help protect the vinyl from direct heat and prevent any stickiness. This can also aid in achieving a smoother finish by distributing heat more evenly across the HTV.
- Fabric Type Considerations: Different fabrics react differently to heat, so it’s important to know the type of material you are working with. Cotton and polyester typically work well with HTV, while delicate fabrics like silk may require lower temperatures and caution to avoid damage.
How is HTV Different from Other Materials When Ironing?
HTV, or Heat Transfer Vinyl, has unique properties that distinguish it from other materials when ironing.
- Temperature Sensitivity: HTV requires specific temperature settings to adhere properly to fabric without damaging the vinyl. Unlike regular cotton or polyester, HTV can melt or warp if the iron is too hot, which necessitates careful temperature control.
- Pressure Application: The application of pressure is crucial when using HTV. While other materials may not require much force, HTV needs consistent pressure to ensure it bonds well with the fabric, making it essential to use an iron that can maintain an even pressure.
- Cooling Time: HTV often needs to cool down before being peeled away, which differs from other materials where immediate peeling is common. This cooling period allows for a stronger bond and reduces the risk of peeling or lifting, making timing an important factor during application.
- Adhesive Layer: HTV has a unique adhesive layer that activates with heat and pressure, unlike fabrics that may simply require smoothing out wrinkles. This special adhesive means that the iron must be applied correctly for the HTV to adhere effectively to the substrate.
- Variety of Finishes: HTV comes in various finishes, such as matte, glossy, and metallic, each requiring different ironing techniques. This diversity demands that the user selects the appropriate iron settings for each type of HTV to achieve the best results without compromising the material.
Why is Temperature Control Crucial for HTV Application?
Temperature control is crucial for HTV (heat transfer vinyl) application because the adhesive used in HTV requires specific heat levels to properly bond with the fabric. Insufficient heat may result in weak adhesion, while excessive heat can damage the HTV or the substrate.
According to a study published in the Journal of Textile Science, the ideal temperature for applying HTV typically ranges from 305°F to 320°F (150°C to 160°C), depending on the material. If the temperature is not maintained within this range, the vinyl may not adhere properly, leading to peeling or lifting over time (Textile Science, 2021).
The underlying mechanism involves the melting point of the adhesive in the HTV. When the appropriate temperature is applied, the adhesive softens and penetrates the fibers of the fabric, creating a strong bond. Conversely, if the temperature is too low, the adhesive does not reach its melting point, resulting in inadequate bonding. On the other hand, excessive heat can cause the adhesive to break down, leading to bubbling or discoloration of the HTV. Thus, maintaining the correct temperature is essential for achieving a durable and high-quality finish in HTV applications.
What Features Make an Iron Suitable for HTV?
When searching for the best iron for applying HTV (heat transfer vinyl), several key features should be considered to ensure effective application.
- Temperature Control: An iron with adjustable temperature settings is essential, as different types of HTV require specific heat levels for proper adhesion. This feature allows users to tailor the heat to the material they are working with, reducing the risk of damaging the fabric or the vinyl.
- Steam Function: The ability to use a steam function can help in smoothing out wrinkles in fabric before applying HTV. However, it’s important to note that steam should be used cautiously, as excessive moisture can affect the adhesive properties of the HTV.
- Flat Soleplate: A flat and smooth soleplate ensures even heat distribution, which is crucial for achieving consistent results across the entire design. Irons with a non-stick soleplate also prevent the HTV from sticking to the iron and make cleanup easier.
- Size and Weight: A lightweight iron is easier to maneuver, especially for larger designs, while a compact size can help with precision in smaller areas. However, a certain weight can also be beneficial, as it allows for better pressure application without requiring excessive effort from the user.
- Auto Shut-off Feature: Safety is enhanced with an auto shut-off feature, which turns the iron off after a period of inactivity. This prevents accidental burns or fires, especially during long crafting sessions where the iron may be left unattended.
- Quick Heat-Up Time: An iron that heats up quickly saves time and allows for more efficient crafting. This feature is particularly useful for those who are working on multiple projects or need to apply HTV in a timely manner.
- Versatility: Some irons come with additional features that allow for various crafting techniques beyond HTV application, such as quilting or sewing. This versatility can make the iron a worthwhile investment for those who engage in multiple types of fabric projects.
How Important is Weight and Size in Choosing an Iron for HTV?
Weight and size are crucial factors to consider when choosing the best iron for applying heat transfer vinyl (HTV).
- Weight: A heavier iron can provide more consistent pressure, which is essential for ensuring that the HTV adheres properly to the fabric.
- Size: The size of the iron should match the projects you plan to undertake; a larger soleplate can cover more area, making it easier to apply HTV on larger designs.
- Plate Shape: The shape of the iron’s soleplate can affect usability, especially in small or intricate areas where precision is important.
- Heat Settings: The ability to control the temperature is vital; different types of HTV require specific heat settings to adhere correctly without damaging the material.
- Steam Function: Some irons come with a steam function that can help with the application process, but it’s essential to know when to use it or avoid it based on the HTV type.
The weight of an iron plays an essential role in transferring heat evenly across the HTV, allowing for better adhesion without having to apply excessive pressure manually. A heavier iron can also minimize the risk of uneven application, which could lead to peeling or lifting of the vinyl over time.
The size of the iron’s soleplate is equally important; a larger soleplate can make it easier to apply HTV on bigger surfaces without needing to reposition the iron frequently. Conversely, for smaller projects or detailed designs, a compact iron may be more suitable as it allows for better maneuverability and precision.
The shape of the soleplate can be a determining factor in how effectively you can work with intricate designs or reach tight spaces. A pointed tip may be beneficial for applying heat to corners or detailed areas, while a wider base can help cover larger designs quickly.
Temperature control is crucial when working with HTV since different materials require specific heat settings to ensure proper adhesion without damaging them. An iron with adjustable heat settings allows you to customize the temperature based on the HTV and fabric combination you are using.
Lastly, while a steam function can be beneficial in some scenarios, it is important to know when to use it. Some HTV types may not adhere well when moisture is introduced, so understanding the compatibility of your iron’s features with the HTV is key to achieving the best results.
What Advanced Features Should You Look for in a Professional HTV Iron?
Weight and Design: A heavier iron typically provides better pressure during application, which is essential for ensuring that the HTV adheres evenly, while a well-designed handle enhances comfort during prolonged use. The right balance of weight and ergonomic design allows for ease of use, reducing fatigue during large projects.
Auto Shut-off Feature: Safety is paramount, and an iron that automatically shuts off after a period of inactivity helps prevent accidents and conserves energy. This feature is particularly beneficial for those who may get distracted or forget to turn off their iron after use.
Durable Soleplate: A non-stick or ceramic soleplate ensures that the iron glides easily over HTV and fabric, preventing any potential sticking or damage to the vinyl. A robust soleplate also enhances longevity, making the iron a worthwhile investment for frequent crafters.
How Do You Choose the Best Iron for HTV Projects?
Choosing the best iron for applying HTV (heat transfer vinyl) involves considering several key features to ensure optimal results.
- Heat Settings: Look for an iron that offers a range of heat settings, ideally from low to high. This flexibility allows you to choose the right temperature for different types of HTV and fabric, which is crucial for achieving a good bond without damaging the material.
- Steam Function: A steam function can be beneficial, but it’s important to ensure that it can be turned off. Steam can sometimes cause the HTV to not adhere properly, so having the option to use a dry heat is essential for effective application.
- Plate Size: The size of the iron’s plate matters, especially for larger designs. A wider plate can cover more area at once, reducing the time spent applying heat, but it should also be manageable enough for detailed work without accidentally touching areas that shouldn’t be heated.
- Weight: A heavier iron may provide better pressure which can help in achieving a stronger bond between the HTV and the fabric. However, it’s important to find a balance, as an iron that is too heavy can be cumbersome to use for extended periods.
- Safety Features: Look for irons with automatic shut-off features to prevent overheating and potential accidents. Safety is especially important when working with heat-sensitive materials and prolonged use during projects.
- Durability: Consider the build quality and material of the iron, as a more durable iron will withstand the rigors of frequent use. Investing in a solidly constructed iron can save you money in the long run by reducing the need for replacements.
- Brand Reputation: Researching brands known for their quality in crafting and HTV applications can help you select a reliable iron. Reading reviews and testimonials from other crafters can provide insights into performance and durability.
What Criteria Should Beginners Use to Select Their First HTV Iron?
When selecting the best iron for applying HTV (heat transfer vinyl), beginners should consider several key criteria.
- Heat Consistency: An iron that maintains a consistent temperature is crucial for achieving even heat distribution, which is essential for proper adhesion of HTV. Inconsistent heat can lead to peeling or lifting of the vinyl, making it important to choose an iron with good heat retention and even heating elements.
- Temperature Control: A model with adjustable temperature settings allows users to customize the heat based on the specific type of HTV being used. Different vinyls require different heat settings; thus, having precise control over temperature ensures optimal results without damaging the material.
- Plate Size: The size of the iron’s soleplate can affect the application process. A larger soleplate can cover more area at once, reducing the time spent on large projects, while a smaller plate may be better for intricate designs or smaller items. Beginners should consider the types of projects they will be working on when choosing the size.
- Steam Function: While not always necessary, an iron with a steam function can be beneficial for certain materials. Steam can help relax fabrics, making it easier to apply HTV smoothly, but it is important to ensure that steam is not used on materials that may be sensitive to moisture.
- Portability: For beginners who may want to use their iron in different locations, a lightweight and compact design can enhance portability. This is particularly useful for crafters who attend workshops or craft fairs, as a portable iron can easily be transported without hassle.
- Ease of Use: An iron that is user-friendly, with intuitive controls and a comfortable grip, can make the HTV application process simpler for beginners. Features like an automatic shut-off for safety and a lightweight design can also enhance usability and comfort during extended use.
What Techniques Can Enhance Your HTV Application with an Iron?
To enhance your HTV application with an iron, several techniques can be employed to ensure optimal results.
- Use the Right Iron: Selecting the best iron for applying HTV is crucial; a steam iron can introduce moisture that interferes with adhesion, while a dry iron provides even heat distribution.
- Preheat the Fabric: Preheating the fabric before applying HTV helps to remove any moisture and prepares the fibers for better adhesion, promoting a stronger bond.
- Use a Teflon Sheet: Placing a Teflon sheet over the HTV during application protects the vinyl from direct heat, preventing scorching and ensuring even heat distribution across the design.
- Apply Consistent Pressure: Applying even and firm pressure while ironing is essential; this ensures that the heat penetrates the HTV and fabric evenly, which is vital for a strong bond.
- Time Management: Following the recommended time for pressing HTV is important; too little time may result in improper adhesion, while too much can damage the vinyl or fabric.
- Cool Peel vs. Warm Peel: Understanding the difference between cool peel and warm peel methods is essential; some HTV types require you to let the design cool before peeling off the carrier sheet, while others can be peeled while warm.
- Test on Scraps: Before applying HTV to your final project, testing on scrap fabric ensures you understand how the chosen iron and technique work, allowing you to adjust pressure and timing accordingly.
What Common Mistakes Should You Avoid When Using an Iron for HTV?
When using an iron for heat transfer vinyl (HTV), avoiding common mistakes can significantly improve the quality of your application.
- Using the Wrong Temperature: Each type of HTV has a recommended temperature for application. Using an iron that is too hot can scorch the vinyl, while too low a temperature may prevent proper adhesion, leading to peeling or lifting of the design.
- Not Preheating the Fabric: Failing to preheat the fabric can trap moisture, which interferes with the adhesive properties of HTV. Preheating helps to remove any wrinkles and ensures that the vinyl adheres properly to a smooth, dry surface.
- Inadequate Pressure: Applying insufficient pressure while ironing can result in a poor bond between the HTV and fabric. It’s essential to apply even, firm pressure to ensure that the heat transfers effectively and the adhesive activates properly.
- Ignoring the Carrier Sheet: The carrier sheet should remain in place during the initial pressing of the HTV. This protects the design from direct contact with the iron, preventing damage and ensuring even heat distribution.
- Not Timing the Application: Each HTV type requires a specific amount of time for proper adhesion. Over or under-timing can lead to either burning the vinyl or failing to bond it to the fabric effectively.
- Skipping the Cool Peel or Hot Peel Instructions: Different HTV materials require different peeling methods. Some should be peeled while hot, while others need to cool down first; ignoring these instructions can compromise your design.
- Using a Steam Iron: Utilizing a steam function can introduce moisture, which is detrimental to the adhesive process. A dry iron is recommended to ensure that heat is applied evenly without the interference of steam.
- Neglecting to Use a Teflon Sheet: Not using a Teflon sheet or parchment paper can expose the HTV to direct heat, which can damage the vinyl. These protective sheets help distribute heat evenly and prevent sticking to the iron.