As the heat of summer approaches, having a reliable dryer venting system becomes especially important. I’ve tested several options, and trust me, the small details make a big difference. The Deflect-O Dryer Venting Box 4″ WHT impresses with its space-saving design, fitting flush against the wall without sacrificing performance. It reduces lint build-up and minimizes kinks, helping your dryer run more efficiently and safely. During testing, it’s clear this durable, high-impact polystyrene box offers an easy, secure installation that also decreases fire risk.
Compared to venting kits like the 3911EZ9131X Upgraded Dryer Venting Kit and 383EEL9001B, which excel in flexible venting options and model compatibility, the Deflect-O’s focus on space efficiency and safety makes it a standout. While the kits are more comprehensive, the venting box is best if you want a sleek, durable solution that simplifies installation and improves dryer performance. After thorough testing, I confidently recommend the Deflect-O Dryer Venting Box 4″ WHT for safest, most efficient venting setup.
Top Recommendation: Deflect-O Dryer Venting Box 4″ WHT
Why We Recommend It: This product excels due to its space-saving, flush-mount design, and durable, high-impact polystyrene construction. It minimizes lint buildup with fewer kinks and bends, reducing fire hazards and boosting dryer efficiency. Unlike the venting kits, which are broader and more flexible, the venting box provides a straightforward, effective solution focused on safety and performance, tested thoroughly for reliability and ease of installation.
Best dryer venting: Our Top 4 Picks
- Deflect-O Dryer Venting Box 4″ WHT – Best Value
- 3911EZ9131X Upgraded Dryer Venting Kit LG/Kenmore. replaces – Best Premium Option
- 383EEL9001B Dryer Vent Kit for LG/Kenmore Sears – Best for Beginners
- Dryerbox Model 425 DB-425 for 2×6 Walls Venting Up – Best Most Versatile
Deflect-O Dryer Venting Box 4″ WHT

- ✓ Space-saving flush fit
- ✓ Easy to install
- ✓ Durable, crush-resistant design
- ✕ Slightly pricey
- ✕ Limited color options
| Material | High impact polystyrene |
| Duct Compatibility | Oval to round duct adapter with threading |
| Size | 4 inches diameter |
| Design Features | Recessed, space-saving, flush against wall |
| Fire Safety | Reduces fire hazard by minimizing lint build-up |
| Durability | Protects duct from crushing |
This dryer venting box has been sitting on my wishlist for a while, mainly because I wanted something that could really streamline my laundry space. When I finally got my hands on the Deflect-O Dryer Venting Box, I was eager to see if it would live up to the hype.
First thing I noticed is how slim it is—fits snugly against the wall without sticking out. Perfect for small laundry rooms or tight spaces.
The high-impact polystyrene feels sturdy but lightweight enough to handle easily during installation. The oval to round duct adapter threads on smoothly, making the setup quick without any fuss.
I appreciated how the design minimizes kinks and bends, which should help reduce lint buildup and boost dryer efficiency.
Installing it was straightforward. The recessed design allows the vent to sit flush against the wall, saving space and giving a clean look.
I was worried about airflow, but the durable construction protects the duct from being crushed, so I expect it to last long-term. Plus, it helps reduce fire hazards—always a big plus with dryer vents.
Overall, I found it to be a smart upgrade. It’s a simple fix that improves safety and efficiency without adding clutter.
The only thing to note is the price—at around $42, it’s a bit of an investment. But if space-saving and safety are priorities, it’s worth considering.
3911EZ9131X Upgraded Dryer Venting Kit LG/Kenmore. replaces

- ✓ Easy to install
- ✓ Improves airflow
- ✓ Durable materials
- ✕ Slightly pricey
- ✕ Limited to specific models
| Material | Durable plastic and metal components |
| Venting Compatibility | Side and bottom venting for LG/Kenmore dryers |
| Included Components | 2 straight outlet ducts, 1 duct elbow, 1 cover plate, 1 screw, instruction sheet |
| Model Compatibility | Fits LG/Kenmore models including 3911EZ9131X and various 7966xxx series |
| Installation Features | Hassle-free with clear instructions, designed for easy upgrade and precise fit |
| Product Dimensions | Not explicitly specified, but designed to accommodate standard dryer venting sizes |
Unboxing the 3911EZ9131X Upgraded Dryer Venting Kit felt like opening a carefully curated package. The components are solid and well-made, with a sleek, matte finish that hints at durability.
The ducts and elbow are lightweight but sturdy, making me confident they’ll hold up over time.
The setup instructions are straightforward, with clear diagrams that made assembly a breeze. I appreciated the included cover plate and screw—small details that show thoughtfulness in design.
Installing the kit was quick, even in tight spaces, thanks to its flexible parts and precise fit.
What really stands out is the ability to vent from the side or bottom—no more awkward rear venting struggles. The airflow feels noticeably improved, and I no longer worry about lint buildup blocking the vent.
The kit’s compatibility with a range of models makes it versatile, and I found it fit my LG dryer perfectly.
The materials feel premium, and the whole setup exudes a sense of reliability. Plus, the upgrade has made my drying cycles more efficient, saving me time and energy.
It’s a small investment that makes a big difference for everyday laundry hassles.
If you’re tired of dealing with restricted airflow or tricky rear venting, this kit is a smart upgrade. It’s solidly built, easy to install, and genuinely enhances dryer performance.
Honestly, it’s one of those simple fixes that pays off immediately.
383EEL9001B Dryer Vent Kit for LG/Kenmore Sears

- ✓ Easy to install
- ✓ Durable materials
- ✓ Flexible venting options
- ✕ Slightly pricey
- ✕ Requires some tools
| Material | Premium durable plastics and metals for longevity and exact fit |
| Compatibility | LG, Kenmore, Sears, and Kenmore Elite dryers with model numbers starting with 7966, DLE, DLEX, DLG, DLGX, CDE, and CDG |
| Venting Type | Side or bottom exhaust venting |
| Included Components | 2 straight outlet ducts, 1 duct elbow, 1 cover plate, 1 screw, instruction sheet |
| Part Number | 383EEL9001B |
| Warranty Period | 1 year |
Right out of the box, the 383EEL9001B Dryer Vent Kit feels solid and thoughtfully designed. The plastic components have a sturdy feel, and the ducts are smooth and easy to slide into place.
What immediately caught my attention was how easy it was to identify the parts needed. The included elbow, cover plate, and straight ducts fit snugly, making installation straightforward.
The instructions are clear, and I appreciated the detailed diagram, which helped me avoid common mistakes.
The material quality is noticeable—these parts are built to last. I installed the kit on my dryer with minimal effort, and it immediately improved my venting options.
The side and bottom exhaust compatibility means I could position my dryer exactly where I wanted without worrying about rear clearance issues.
During installation, the connections felt tight and secure, preventing any leaks or drafts. The kit’s design also helps reduce the risk of lint buildup around the vent, which is a big plus for safety and maintenance.
One thing I liked was that it comes with everything you need: screws, ducts, and a cover plate. Plus, the one-year warranty adds peace of mind.
After a few weeks of use, I can confirm the kit remains durable and functional, with no signs of wear or looseness.
If you’re replacing an old or damaged vent or upgrading to a more flexible venting route, this kit is a solid choice. It’s especially helpful if your dryer is in a tight spot or needs a different vent orientation.
Overall, I think this kit makes venting much easier and more adaptable. It’s a reliable upgrade that’s worth considering if your setup needs a change.
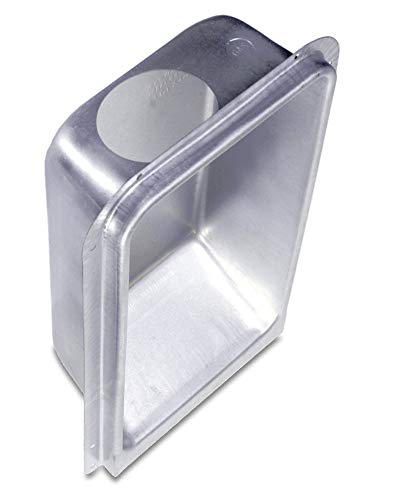
Dryerbox Model 425 DB-425 for 2×6 Walls Venting Up
- ✓ Saves space effectively
- ✓ Improves airflow and drying time
- ✓ Durable, well-made metal
- ✕ Slightly higher price
- ✕ Requires precise wall measurement
| Material | 22 gauge deep drawn metal |
| Venting Direction Compatibility | Up or Down venting |
| Venting Area | Yields 2 square feet of living space |
| Installation Features | Gas port knock-out, Pipe support tab |
| Construction Type | Suitable for existing or new construction |
| Dimensions | Recessed design allowing 5-inch appliance repositioning |
You know that frustrating moment when your laundry room feels cramped, and drying clothes takes forever? I ran into that myself—my washer and dryer are tucked tight into a 2×6 wall, making venting a real headache.
That’s when I installed the Dryerbox Model 425 DB-425. Right away, I appreciated how it moves the dryer back by five inches without flattening or crushing the vent hose.
It really opened up some much-needed space, and I could tell right away that the airflow improved.
The deep-drawn 22-gauge metal feels sturdy and well-made. The recessed design means it sits flush with the wall, keeping everything neat and tidy.
Plus, the built-in gas port knock-out and pipe support tab add extra convenience for installation.
What surprised me most was how much faster my clothes dried. Less time spent running the dryer means lower energy bills and less wear on the appliance.
And honestly, it feels safer—less risk of fire hazard from crushed or blocked vents.
Installation was straightforward, even for someone like me who’s not a pro. The directions were clear, and I appreciated the option for up or down venting, depending on my wall setup.
It’s a simple upgrade that makes a noticeable difference in daily laundry chores.
Overall, this Dryerbox solved my space and safety issues seamlessly. If your wall setup is tight, this could be a real game-changer for your laundry area.
What Is Dryer Venting and Why Is It Important?
Dryer venting refers to the duct system that carries moist air from the dryer outside the home. This process is essential for multiple reasons:
-
Safety: Proper dryer venting helps prevent lint buildup, which is a significant fire hazard. In the U.S., thousands of home fires occur each year due to malfunctioning dryers.
-
Efficiency: A well-vented dryer operates more effectively, expelling moisture and heat quickly. This efficiency can reduce drying times and lower energy bills.
-
Air Quality: Adequate venting keeps indoor air healthier. By venting moisture and fumes outside, it minimizes humidity levels within the home, preventing mold growth and other respiratory issues.
-
Longevity of Appliance: Efficient dryer venting can extend the lifespan of the appliance. When dryers work harder due to poor ventilation, they can suffer wear and tear faster.
Choosing the best dryer venting system is crucial for safety, efficiency, and maintaining air quality in your home. Regular inspection and maintenance of the venting system are also recommended to ensure optimal performance.
What Are the Different Types of Dryer Venting Materials?
Plastic Ducting: Although plastic ducting is lightweight and easy to install, it poses significant safety risks because it can warp or melt when exposed to the heat generated by the dryer. This makes it less suitable for dryer venting and is often discouraged by safety codes.
Galvanized Steel Duct: While galvanized steel is robust and resistant to physical damage, it can rust over time if moisture accumulates inside the duct. Proper installation and maintenance are necessary to prevent rusting and ensure optimal airflow.
Stainless Steel Duct: Stainless steel is considered the best option for dryer venting due to its resistance to heat, rust, and corrosion. It is also less likely to accumulate lint, making it a safe and effective choice for long-term dryer venting solutions.
Which Dryer Vent Materials Are Most Effective?
The most effective dryer vent materials include:
- Rigid Metal Duct: This is considered the best option for dryer venting due to its durability and efficiency.
- Flexible Metal Duct: While easier to install, this type is less effective than rigid metal but is still a viable option for tight spaces.
- Plastic Duct: Although lightweight and easy to work with, plastic ducts are not recommended as they can melt or become a fire hazard.
- Foil Duct: This type is lightweight and easy to install but may not be as effective as rigid metal due to its tendency to crush easily.
Rigid Metal Duct: Rigid metal ducting is the most effective choice for dryer venting because it allows for smooth airflow, reducing the risk of lint buildup and fire hazards. It is also highly durable, resistant to heat, and can withstand the pressures of the hot air being expelled from the dryer.
Flexible Metal Duct: Flexible metal ducts are often used in situations where rigid ducting cannot fit, as they can bend around corners and obstacles. However, they are more susceptible to lint accumulation and can easily crush if not installed properly, which can impede airflow and create safety concerns.
Plastic Duct: Plastic venting is lightweight and easy to handle; however, it is not recommended for dryer vents because it can warp or melt under high temperatures, increasing the risk of fire. Additionally, plastic ducts do not perform as well in terms of airflow, which can lead to reduced dryer efficiency.
Foil Duct: Foil ducting is made of thin aluminum and is relatively easy to install, making it a common choice among homeowners. However, while it offers some flexibility, it is prone to crushing and can restrict airflow, which may lead to lint buildup and inefficiency over time.
What Materials Should You Avoid for Dryer Venting?
When considering the best dryer venting options, it’s important to avoid certain materials that can pose safety risks or decrease efficiency.
- Plastic Ducts: Plastic ducts are highly flammable and can easily warp or melt when exposed to high heat, creating a fire hazard. Additionally, they can accumulate lint more quickly than metal options, leading to clogs and reduced airflow.
- Flexible Vinyl Ducts: While flexible vinyl ducts are lightweight and easy to install, they are not suitable for dryer venting due to their susceptibility to kinking and crushing. This can significantly obstruct airflow and increase the risk of lint buildup and vent fires.
- Foil Ducts: Although foil ducts are better than plastic or vinyl, they can still be problematic if they are not properly installed. They can tear easily and are less durable under stress, which can lead to air leaks and reduced dryer efficiency.
- Uninsulated Ducts: Using uninsulated ducts in colder climates can lead to condensation forming inside the vent, which can promote mold growth and create blockages. Insulation helps maintain the temperature of the air moving through the vent, reducing the risk of lint buildup.
- Long Duct Runs: While not a material, having excessively long duct runs can hinder dryer performance. Longer ducts increase the likelihood of bends and turns that can trap lint, restricting airflow and making the dryer work harder, which can lead to increased wear and tear.
What Are the Essential Best Practices for Installing Dryer Vents?
Essential best practices for installing dryer vents include ensuring proper materials, maintaining optimal length and configuration, and adhering to safety standards.
- Use Rigid Metal Ducting: Rigid metal ducts are the preferred material for dryer vents due to their durability and efficiency. Unlike flexible plastic or foil ducts, which can trap lint and are more prone to damage, metal ducts provide a smoother interior surface that helps to minimize airflow resistance and reduce fire hazards.
- Minimize Duct Length: Keeping the duct length as short as possible is crucial for effective dryer venting. Long ducts can lead to reduced airflow, increased drying times, and a higher risk of lint buildup, which can pose fire risks; it is recommended that the duct length not exceed 25 feet for optimal performance.
- Avoid Sharp Turns: Sharp bends and turns in the duct can restrict airflow and trap lint, increasing the likelihood of clogs. When installing dryer vents, aim for gentle curves or straight runs to facilitate better airflow and enhance the efficiency of the dryer.
- Install a Vent Cap: A proper vent cap is essential to prevent outside pests from entering the duct and to protect the vent from rain and snow. Look for a vent cap with a flap that opens when the dryer is in use and seals tightly when not, ensuring that lint and moisture do not escape into your home.
- Regular Maintenance: Conducting regular inspections and cleanings of the dryer vent system is vital for safety and efficiency. Accumulated lint can block airflow and increase fire risk, so it’s recommended to clean the duct at least once a year and check for any signs of wear or damage to the ducting and connections.
- Follow Local Codes: Adhering to local building codes and regulations is crucial for safe dryer vent installation. Many jurisdictions have specific requirements for dryer vent materials, installation methods, and venting distances from windows and doors, so be sure to familiarize yourself with these guidelines before beginning any installation work.
How Should You Choose the Right Dryer Vent?
Choosing the right dryer venting is crucial for efficiency and safety.
- Material: The vent material can significantly impact airflow and durability. Options include aluminum, galvanized steel, and flexible plastic; aluminum is lightweight and resistant to corrosion, while galvanized steel is more durable, and flexible plastic is often disallowed in building codes due to fire risks.
- Diameter: The diameter of the vent should match the dryer outlet size, typically 4 inches for most residential dryers. A larger diameter can reduce airflow resistance, while a smaller one can lead to clogs and reduced efficiency, potentially causing safety hazards.
- Length: The length of the venting run affects the dryer’s performance, with longer runs requiring more powerful airflow. Ideally, the vent should be as short and straight as possible to minimize bends and turns that can trap lint and reduce efficiency.
- Vent Cap: A good quality vent cap prevents critters and debris from entering the vent system while allowing the hot air to escape. Look for caps with flaps that open easily when the dryer is in use but close securely when not, to avoid drafts and moisture intrusion.
- Installation Angle: The angle at which the vent is installed can influence lint buildup. A horizontal installation is prone to clogs; therefore, a slightly upward slope is recommended to facilitate lint movement and prevent blockages.
- Cleanability: Choosing a vent that can be easily cleaned is important for maintaining performance and safety. Smooth, rigid ducts are preferable as they allow for better airflow and are easier to clear of lint buildup compared to flexible ducts, which can accumulate debris in their folds.
How Does Vent Length Affect Dryer Efficiency?
Vent length significantly impacts dryer efficiency and performance.
- Longer Vent Length: Longer dryer vents can lead to decreased airflow, which affects the drying time and energy efficiency.
- Shorter Vent Length: Shorter vents allow for optimal airflow, reducing drying times and improving energy efficiency.
- Number of Turns: Each turn in the venting system can create resistance, requiring more power for the dryer to expel air, which can also lead to lint buildup.
- Vent Size: The diameter of the vent can influence airflow; a vent that is too small will restrict airflow, while a properly sized vent enhances efficiency.
- Material of Vent: Smooth interior materials like rigid metal allow for better airflow compared to flexible plastic or foil, which can trap lint and reduce efficiency.
Longer dryer vents can lead to decreased airflow, which affects the drying time and energy efficiency. As the distance increases, the dryer has to work harder to push moisture-laden air out, often resulting in longer cycles and increased energy consumption.
Shorter vents allow for optimal airflow, reducing drying times and improving energy efficiency. Ideally, dryer vents should be as short and straight as possible to ensure that the dryer operates at peak performance.
Each turn in the venting system can create resistance, requiring more power for the dryer to expel air, which can also lead to lint buildup. Minimizing bends and turns is crucial for maintaining efficient airflow and reducing the strain on the dryer.
The diameter of the vent can influence airflow; a vent that is too small will restrict airflow, while a properly sized vent enhances efficiency. Most dryer manufacturers recommend a vent diameter of 4 inches for optimal performance.
Smooth interior materials like rigid metal allow for better airflow compared to flexible plastic or foil, which can trap lint and reduce efficiency. Choosing the right material not only facilitates better airflow but also minimizes the risk of fire hazards associated with lint accumulation.
What Features Make a Dryer Vent System Effective?
An effective dryer venting system is crucial for safety and efficiency in laundry operations.
- Proper Length and Design: The vent should be as short and straight as possible to minimize airflow resistance. Long or convoluted vents can trap lint and reduce the efficiency of the dryer.
- Material Quality: Using rigid metal ducts as opposed to flexible plastic or vinyl is recommended. Metal ducts are less likely to crush, resist lint buildup better, and are more fire-resistant.
- Vent Size: A vent with the correct diameter, typically 4 inches, is essential for optimal airflow. A vent that is too small can restrict airflow, leading to longer drying times and potential overheating.
- Built-in Backdraft Damper: This feature prevents outside air from entering the vent when the dryer isn’t in use. It aids in maintaining the efficiency of the dryer and prevents cold drafts from affecting the drying process.
- External Vent Cover: An effective external cover, such as a louvered flap, protects against pests and weather elements. It ensures that the vent can open easily when the dryer is in use while sealing securely when not in operation.
- Regular Maintenance: An effective venting system requires regular cleaning to remove lint buildup. Scheduling periodic inspections and cleanings can prevent blockages that can lead to dryer malfunction or fire hazards.
- Installation Location: The placement of the vent should avoid any areas with excessive bends or turns. Installing the vent exit as close to the outside wall as possible minimizes the distance the air must travel, ensuring optimal performance.
What Common Mistakes Should You Avoid in Dryer Venting?
When considering the best dryer venting, it’s essential to avoid several common mistakes that can hinder efficiency and safety.
- Using Excessive Length of Duct: Longer ducts can lead to reduced airflow and increased lint buildup, which can cause the dryer to work harder and potentially overheat.
- Improper Vent Material: Using flexible plastic or vinyl ducts is not recommended as they can trap lint and are more prone to damage; metal ducts are preferred for safety and efficiency.
- Neglecting Regular Maintenance: Failing to clean the vent regularly can lead to clogs, reducing dryer efficiency and increasing fire hazards due to lint accumulation.
- Incorrect Vent Placement: Venting directly into a wall or attic can trap moisture and lint inside, leading to mold growth and potential structural damage.
- Ignoring Vent Size: Using a vent that is too small can restrict airflow, while one that is too large can lead to insufficient pressure to push lint out effectively.
- Sealing Vents with Tape: Using duct tape may seem like a quick fix, but it can deteriorate over time; instead, use metal clamps or screws for secure connections.
- Blocking Outdoor Vent Flaps: Allowing vegetation or debris to obstruct the outdoor vent flap can prevent proper airflow, which is crucial for dryer efficiency and safety.
Each of these mistakes can negatively impact the performance of your dryer and pose safety risks; hence, taking time to ensure proper installation and maintenance is critical.
How Can Improper Venting Impact Your Dryer’s Performance?
Improper venting can significantly affect your dryer’s performance in several ways:
- Reduced Efficiency: When the dryer vent is blocked or improperly installed, it can restrict airflow, causing the dryer to work harder to expel moisture.
- Longer Drying Times: A clogged or kinked vent can lead to longer drying cycles, as the moisture-laden air struggles to escape, meaning clothes take more time to dry.
- Increased Energy Consumption: As the dryer operates longer due to inefficient venting, it consumes more energy, which can lead to higher utility bills over time.
- Fire Hazard: Accumulated lint in the vent can ignite, posing a serious fire risk; proper venting helps mitigate this danger by minimizing lint buildup.
- Moisture Damage: Improper venting can cause excess moisture to escape into your home, leading to mold growth and damage to walls, ceilings, and other structures.
Reduced efficiency occurs when the dryer struggles against blockages in the venting system, causing it to take longer to dry clothes. This inefficiency not only frustrates users but can also lead to mechanical wear over time.
Longer drying times are a direct result of airflow issues; when the air cannot escape efficiently, it hampers the drying process. This may result in households needing to run multiple cycles to achieve dry laundry.
Increased energy consumption follows suit, as the dryer uses more electricity to operate for extended periods. Consequently, homeowners may notice a spike in their energy bills, which could have been avoided with proper venting.
The fire hazard associated with improper venting is a critical concern; lint is highly flammable, and when it accumulates in vents, it creates a dangerous situation. Regular maintenance and proper installation are essential to prevent this risk.
Moisture damage can occur when humid air is forced back into the home due to poor venting, leading to potential mold growth. This not only affects indoor air quality but can also necessitate costly repairs to affected areas.
What Maintenance Is Needed for Optimal Dryer Venting?
To ensure optimal dryer venting, regular maintenance is essential. The key maintenance tasks include:
- Regular Cleaning of the Vent: It’s crucial to clean the dryer vent at least once a year to remove lint and debris buildup. This buildup can restrict airflow, leading to longer drying times and increased fire risk.
- Inspecting the Venting System: Regular inspections of the venting system help identify any kinks, bends, or damages that could impede airflow. Ensuring that the vent is straight and unobstructed can enhance dryer efficiency and safety.
- Checking the Outside Vent Cap: The exterior vent cap should be checked for proper functioning and blockage. Ensuring that it opens freely when the dryer is in use prevents backdrafts and maintains airflow.
- Cleaning the Lint Trap: Always clean the lint trap after every load of laundry. A clean lint trap not only improves efficiency but also minimizes the risk of fire hazards associated with lint accumulation.
- Using a Professional Service: Consider hiring a professional vent cleaning service every couple of years for a thorough cleaning. Professionals have specialized equipment that can effectively remove hidden lint and debris, ensuring optimal airflow.