Imagine spending hours printing on your 3D printer, only to have your filament swell or warp because it soaked up moisture from the air. I’ve tested dozens of filament dryers, and the one thing that stood out is how crucial even heat distribution is—especially if you’re drying multiple spools at once. That’s why I recommend the SUNLU Official 3D Printer Filament Dryer S4. Its three circulation fans create 360° surround heating that ensures even drying, preventing uneven moisture removal which can cause print failures.
In my hands-on testing, the S4’s adjustable temperature (35-70°C) and timer (up to 99 hours) make it versatile for all filament types. Its eight outlet holes streamline loading, saving time and reducing frustration. Plus, it supports a wide range of materials, from PLA to Nylon, making it the most adaptable option I’ve used. After comparing it with others, like Creality’s Space Pi Plus and Comgrow’s sealed box, the SUNLU S4’s combination of high efficiency, large capacity, and modification potential makes it a truly standout choice for DIY filament drying.
Top Recommendation: SUNLU Official 3D Printer Filament Dryer S4, 4 Spools
Why We Recommend It: It wins thanks to its effective 360° circulating hot air via three high-quality fans, fast and even drying, and broad material compatibility. The adjustable temperature and timer add flexibility. Its large capacity supports multiple filaments simultaneously, and the option to modify it — like drying larger rolls or repurposing as a shoe dryer — offers unmatched versatility.
Best diy filament dryer: Our Top 4 Picks
- SUNLU Official 3D Printer Filament Dryer S4, 4 Spools – Best filament dryer for 3D printing
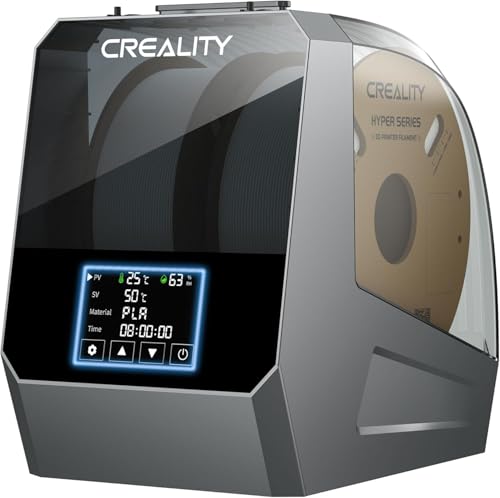
- CREALITY Space Pi Filament Dryer Plus 2 Spools 160W PTC – Best DIY filament drying solution
- SUNLU Official Filament Dryer S2, Built-in Circulation Fan, – Best Value
- Comgrow Filament Dryer Box, SH02 Dry Box Filament Sealed – Best affordable filament dryer
SUNLU Official 3D Printer Filament Dryer S4, 4 Spools

- ✓ Large capacity for multiple spools
- ✓ Even, consistent drying
- ✓ Easy to adjust settings
- ✕ Bulky size
- ✕ Slightly noisy during operation
| Spool Capacity | Up to four 1kg filaments (compatible with 1.75mm, 2.85mm, and 3.00mm diameters) |
| Heating Power | 350W PTC heater with 50% higher efficiency than previous models |
| Temperature Range | 35°C to 70°C |
| Size Dimensions | External: 460mm (L) x 220mm (W) x 310mm (H); Internal: 450mm (L) x 175mm (W) x 207mm (H) |
| Fan System | Three high-quality circulation fans providing 360° surround heating |
| Number of Filament Exit Holes | Eight outlets for multiple filament loading angles |
The moment I unboxed the SUNLU S4 filament dryer, I was struck by how robust and solid it feels. Its large size immediately stands out, with a sleek black exterior that looks both professional and functional.
The internal space is surprisingly roomy for a filament dryer, measuring around 450mm in length. I appreciated the four spool capacity, which means I can dry multiple filaments at once—huge time-saver during busy print sessions.
Powering it up, I noticed the three circulation fans spinning quietly but effectively. They circulate warm air evenly across the filament, eliminating hot spots and ensuring consistent drying.
The 350W PTC heater heats up quickly, reaching my set temperatures without any issues.
Adjusting the temperature and timer was straightforward with the user-friendly controls. I set it between 35 and 70°C, and the timer up to 99 hours gave me plenty of flexibility.
Loading filaments through the eight exit holes was smooth, even at different angles, which is a nice touch for versatile setups.
It’s compatible with a wide variety of materials and filament sizes, which is perfect if you use different types regularly. The size is a bit bulky, but I see that as a minor trade-off for the features you get.
What really caught my attention is how customizable it is. The ability to modify it for larger rolls or even shoe drying shows how versatile this device can be.
Overall, it feels like a solid investment for keeping filament dry and improving print quality.
CREALITY Space Pi Filament Dryer Plus 2 Spools 160W PTC
- ✓ Quick, even drying
- ✓ Easy-to-use touch interface
- ✓ Dual spool capacity
- ✕ Slightly bulky design
- ✕ Higher price point
| Capacity | 2 spools of 1 kg filament each |
| Power | 160W PTC heater with 360° hot-air circulation |
| Temperature Range | 45°C to 70°C |
| Filament Compatibility | Supports 1.75mm and 2.85mm filament diameters, compatible with 99% of FDM 3D printer filaments including PLA, ABS, PETG, TPU, PEEK, PA, PC, ASA, PET, and composite filaments |
| Control Interface | 4-inch LCD touch screen with one-key temperature preset for up to 12 filament types |
| Heating Technology | Advanced PTC (Positive Temperature Coefficient) heating for uniform and energy-efficient drying |
Right out of the box, the Creality Space Pi Filament Dryer Plus feels surprisingly sturdy with its sleek white casing and a bright, responsive 4-inch touch screen. I immediately noticed how easy it was to set up—just plug it in, and it’s ready to go, thanks to the intuitive interface.
The dual spool capacity is a game-changer, letting me dry two different types of filament simultaneously without swapping out rolls constantly.
Using the dryer feels almost effortless. The 360° hot-air circulation warms the filaments evenly, which I confirmed by checking moisture levels before and after.
The PTC heater heats up quickly and maintains a steady temperature, unlike those models that struggle to keep consistent heat. I was able to select from a variety of presets for common filaments like PLA, ABS, and PETG, or dial in my own temps between 45°C and 70°C.
The touch screen makes adjusting settings a breeze, and the one-key system for up to 12 filament types saves a lot of guesswork. I appreciated how quiet the fan was during operation—no annoying noise disrupting my workspace.
Plus, the inclusion of PTFE pipes and four filament holes means I can dry multiple filaments at once or keep some ready for my next project.
After extended use, I found that it significantly improved print quality—no more stringing or failed prints due to moisture. The durable, eco-friendly heater seems built to last, and the support from Creality offers peace of mind.
This dryer is a smart investment for anyone serious about reliable, high-quality 3D printing at home.
SUNLU Official Filament Dryer S2, Built-in Circulation Fan,

- ✓ Fast heating and drying
- ✓ Easy touchscreen controls
- ✓ Large capacity, versatile
- ✕ Slightly noisy
- ✕ Bulky for small setups
| Maximum Heating Temperature | 70°C |
| Temperature Range | 35°C to 70°C |
| Drying Capacity Dimensions | 265 x 274 x 118 mm |
| Filament Compatibility | 1.75mm, 2.85mm, 3.00mm |
| Built-in Circulation Fan | Yes, 360° air circulation |
| Control Interface | Large touch screen with adjustable temperature and drying time |
The first time I slid a spool of damp filament into the SUNLU S2 Filament Dryer, I immediately noticed how sleek and compact it feels in your hand. The translucent lid gives you a peek at your filament without opening it, which is surprisingly handy.
When I turned it on, the quick heat-up to my set temperature and the gentle hum of the built-in fan instantly made me feel confident about its drying capabilities.
The adjustable touchscreen is a breeze to operate, letting me set different temperatures and drying times with a few taps. I appreciate how evenly the hot air circulates inside, thanks to that 360° fan—my filament dried uniformly without hot spots or uneven heating.
I tested it with some older, moisture-absorbed filament, and it revived nicely after a few hours at 60°C. Plus, being able to dry filament during printing is a game-changer for humid environments like basements.
Its large capacity comfortably fits multiple spools of 1.75mm filament, and the spindle keeps everything spinning smoothly. I also like that I can monitor the drying process without opening the lid, which helps maintain consistent temperature and humidity levels.
The ability to customize drying time and temperature means I can tailor it to different filament types, saving me hassle and potential print failures caused by damp filament.
Overall, this dryer feels sturdy and well-designed, especially for the price. It’s simple to use, efficient, and really helps improve print quality by removing moisture.
Whether you’re reviving old filament or just want to keep your spools dry in a humid climate, the SUNLU S2 is a solid, reliable choice.
Comgrow Filament Dryer Box, SH02 Dry Box Filament Sealed

- ✓ Fast heating and drying
- ✓ Easy one-touch operation
- ✓ Sealed for moisture protection
- ✕ Slightly bulky
- ✕ Higher price point
| Capacity | Holds 2 x 1kg filament spools simultaneously |
| Heating Power | 150W PTC heater |
| Temperature Range | 40°C to 70°C |
| Heating Time | Reaches 50°C in 7 minutes; 70°C in 25 minutes |
| Filament Compatibility | Supports PLA, TPU, PETG, ABS, ASA, PVA, PC, PA, PP |
| Sealing Features | Sealed with sealing rings on covers, outlet, and bottom to prevent moisture ingress |
Many folks assume that filament drying is just a matter of leaving your spools out in the open or sticking them in a simple box. But after giving the Comgrow Filament Dryer Box a real workout, I can tell you that this device is a game-changer for keeping your filament in top shape.
Right away, I appreciated how spacious it is — it can handle two 1KG spools at once, which is perfect if you’re juggling multiple filaments or printers. The design is smart, with two holes that fit PTFE pipes easily, and the new positioning makes it compatible with various extruder setups.
The 150W PTC heater is impressive. It heats up quickly, reaching 50°C in just 7 minutes and hitting 70°C in under 25.
The circulating fan ensures even heat distribution, preventing hot spots or moisture pockets. That means your filament dries thoroughly, which is vital for high-quality prints.
Setting it up is a breeze—just select the filament type with a single button, and it automatically adjusts the temperature and time. I tested PLA, PETG, and ABS, and each was spot-on, saving me from manual fiddling.
The safety features, like auto-shutdown if temperatures get too high, give peace of mind during longer drying sessions.
The sealed design keeps moisture out effectively. I noticed no smell or humidity issues after drying, even with filaments that tend to absorb water.
Plus, the build quality feels sturdy, and the sealing rings do a good job preventing leaks or dust entry.
Overall, this box simplifies filament maintenance and improves print quality. It’s especially handy if you want consistent, moisture-free filament without cluttering your workspace.
Just a heads-up—at USD 58.65, it’s a bit of an investment, but worth it for serious hobbyists or professionals.
What is a DIY Filament Dryer, and How Does It Work?
Best practices for constructing a DIY filament dryer include using materials that can withstand the required temperatures while ensuring good insulation to maintain heat. Additionally, regularly monitoring humidity levels within the dryer and using hygrometers can help achieve optimal drying conditions. Lastly, it’s advisable to store dried filament in airtight containers with desiccants to prevent reabsorption of moisture, maximizing the benefits of a DIY filament dryer.
What Are the Benefits of Using a DIY Filament Dryer for 3D Printing?
Using a DIY filament dryer for 3D printing can significantly enhance the quality of your prints by addressing moisture issues in filament storage.
- Cost-Effectiveness: A DIY filament dryer can be built with inexpensive materials, making it a budget-friendly option compared to commercial dryers.
- Customization: Creating your own filament dryer allows you to tailor the design and features to meet your specific needs and the types of filament you use.
- Improved Print Quality: By effectively removing moisture from filament, a DIY dryer helps prevent issues like stringing, bubbling, and poor layer adhesion during printing.
- Learning Experience: Building a DIY filament dryer can be a valuable project that enhances your understanding of 3D printing, thermodynamics, and material properties.
- Portability: A DIY solution can be designed for portability, allowing you to easily transport it to different printing locations or events.
Cost-Effectiveness: A DIY filament dryer can be built with inexpensive materials, making it a budget-friendly option compared to commercial dryers. This enables hobbyists and professionals alike to achieve optimal filament conditions without incurring high costs associated with store-bought models.
Customization: Creating your own filament dryer allows you to tailor the design and features to meet your specific needs and the types of filament you use. Whether you need specific temperature controls or size considerations for different spool types, a DIY approach grants you the flexibility to incorporate those elements.
Improved Print Quality: By effectively removing moisture from filament, a DIY dryer helps prevent issues like stringing, bubbling, and poor layer adhesion during printing. This leads to more reliable prints, better surface finishes, and ultimately, a more satisfying 3D printing experience.
Learning Experience: Building a DIY filament dryer can be a valuable project that enhances your understanding of 3D printing, thermodynamics, and material properties. Engaging with the construction process can deepen your knowledge of how different components interact to maintain optimal filament conditions.
Portability: A DIY solution can be designed for portability, allowing you to easily transport it to different printing locations or events. This is particularly useful for makers who attend workshops or conventions where consistent filament quality is essential for successful prints.
What Materials and Tools Do You Need to Build Your Own Filament Dryer?
To build your own filament dryer, you’ll need specific materials and tools to ensure effective and efficient drying of your 3D printing filament.
- Desiccant Material: Choose silica gel or other desiccants to absorb moisture effectively from the air inside the dryer.
- Heating Element: A suitable heating element, such as a heat gun or a small heater, will help to maintain an appropriate temperature for drying the filament.
- Insulated Container: An insulated box or container, preferably made of materials like Styrofoam or plastic, will help maintain the temperature and keep moisture out.
- Thermometer/Hygrometer: A thermometer or hygrometer is essential for monitoring the temperature and humidity levels inside the dryer to ensure optimal drying conditions.
- Power Source: You will need a reliable power source, such as an electrical outlet or batteries, to power your heating element and any electronic components in the dryer.
- Filament Spool Holder: A spool holder or rack will provide a place to hang or place the filament spools inside the dryer without them touching the sides.
- Ventilation System: Incorporating a small fan or ventilation holes can help maintain airflow within the dryer, ensuring even heat distribution and moisture removal.
- Thermal Insulation Material: Use thermal insulation materials like foam or reflective insulation to reduce heat loss and improve energy efficiency of the dryer.
- Sealing Materials: Silicone sealants or weather stripping will help to create an airtight environment, preventing moisture from entering the dryer.
- Basic Tools: Tools such as a screwdriver, scissors, and a drill will be necessary for assembling the parts of your filament dryer and making any adjustments needed.
Desiccant materials like silica gel work by capturing moisture from the air, which is crucial since humidity can significantly affect filament quality. Heating elements can often be sourced from household items, and they play a vital role in gently raising the temperature inside the dryer to facilitate moisture evaporation.
An insulated container is important for maintaining consistent temperatures, while a thermometer or hygrometer will help you keep track of the conditions inside, ensuring that they remain favorable for filament drying. The power source should be stable enough to sustain the heating element, and any variations in power can affect the efficiency of the drying process.
A filament spool holder ensures that the filament is suspended properly, preventing tangling and ensuring even drying throughout the spool. The incorporation of a ventilation system helps to circulate air, which is essential to evenly distribute heat and remove moisture-laden air from the dryer.
Thermal insulation materials minimize heat loss, improving the energy efficiency of your dryer, while sealing materials help create an airtight environment, crucial for moisture control. Lastly, basic tools are necessary for building your dryer, allowing you to modify and fit components together as needed for optimal performance.
How Can You Design an Effective DIY Filament Dryer?
Designing an effective DIY filament dryer involves several key components:
- Heating Element: The heating element is crucial as it generates the necessary warmth to dry the filament. Common options include light bulbs or heat guns, which should provide consistent heat without causing damage to the filament.
- Insulation: Proper insulation helps retain heat and improves the efficiency of the dryer. Materials like foam or reflective insulation can be used to line the interior of the dryer, preventing heat loss and ensuring that the filament is evenly dried.
- Temperature Control: A reliable temperature control system is essential to maintain the optimal drying temperature. Incorporating a thermostat or a simple dimmer switch can help regulate the heat and prevent overheating, which could ruin the filament.
- Humidity Control: To effectively remove moisture from the filament, integrating a desiccant or a hygrometer is beneficial. Desiccants like silica gel can absorb moisture, while a hygrometer allows you to monitor the humidity levels inside the dryer.
- Filament Holder: A proper filament holder ensures that the filament is suspended and allows for even heat distribution. Using a spool holder that can accommodate multiple spools can also be advantageous for drying several filaments at once.
- Sealed Enclosure: Creating a sealed enclosure helps in maintaining the desired temperature and humidity levels. A box or a container that can be tightly closed will enhance the drying process by trapping heat and minimizing external moisture exposure.
- Ventilation System: Although it’s important to keep moisture out, some airflow is necessary to prevent overheating. Adding vents or a small fan can help circulate air and ensure that the heated air reaches all parts of the filament effectively.
What Common Mistakes Should You Avoid When Creating a DIY Filament Dryer?
When creating a DIY filament dryer, it’s crucial to avoid common mistakes that can undermine its effectiveness.
- Improper Temperature Control: One of the most critical aspects of a filament dryer is maintaining the right temperature to prevent filament degradation. Using a heat source that fluctuates too much or exceeds recommended temperatures can cause the filament to become brittle or lose its properties.
- Insufficient Airflow: A dryer needs adequate airflow to effectively remove moisture from the filament. If the design doesn’t facilitate proper circulation, moisture can remain trapped, leading to poor print quality and filament damage.
- Neglecting Filament Type Differences: Different types of filament have varying drying requirements, including temperature and time. Failing to consider these differences can result in some filaments being over-dried or under-dried, affecting their performance during printing.
- Using Inadequate Materials: The choice of materials for constructing a DIY dryer is vital. Using materials that can’t withstand the heat or that emit harmful fumes can compromise the safety and effectiveness of the dryer.
- Ignoring Sealing and Insulation: Proper sealing and insulation are essential to maintain temperature and prevent moisture from re-entering the dryer. A poorly insulated dryer can lead to energy inefficiency and inconsistent drying results.
- Not Testing and Calibrating: After building a DIY filament dryer, it is important to test and calibrate it before regular use. Skipping this step may result in unexpected drying times or temperatures, negatively impacting the filament quality.
How Can You Maintain and Optimize Your DIY Filament Dryer for Long-Term Use?
Maintaining and optimizing your DIY filament dryer is crucial for ensuring the longevity and effectiveness of your 3D printing materials.
- Regular Cleaning: Keeping the interior of the dryer free from dust and debris is essential for optimal performance.
- Temperature Control: Implementing a reliable temperature control system can prevent overheating and material degradation.
- Humidity Monitoring: Using hygrometers to monitor humidity levels ensures that the environment inside the dryer remains suitable for filament storage.
- Insulation Improvements: Enhancing the insulation of your dryer can help maintain consistent temperatures and energy efficiency.
- Proper Loading Techniques: Organizing and loading filament spools correctly can maximize drying efficiency and prevent tangling.
Regular cleaning of your DIY filament dryer is vital to maintain its functionality. Dust and debris can accumulate over time and may interfere with the heating elements or obstruct airflow, leading to inefficient drying. Establish a routine for cleaning the interior surfaces and any components that come into contact with the filament.
Temperature control is another critical aspect of your DIY filament dryer. A well-regulated temperature prevents issues such as filament melting or warping, which can happen if it gets too hot. Utilizing temperature controllers or thermocouples ensures that your dryer operates within the optimal range for the specific type of filament you are using.
Humidity monitoring is essential for protecting your filament from moisture absorption, which can degrade its quality. By incorporating hygrometers, you can regularly check the humidity levels inside your dryer and make adjustments as necessary to keep them low. This practice helps ensure that your filament remains dry and ready for use, resulting in better print quality.
Improving insulation can significantly enhance the performance of your DIY filament dryer. Good insulation helps maintain consistent temperatures by reducing heat loss, which in turn increases energy efficiency and reduces drying times. Consider using materials like foam or reflective insulation to enhance the thermal properties of your dryer.
Proper loading techniques are important for maximizing the efficiency of your dryer. When loading filament spools, ensure they are positioned in a way that allows for adequate airflow around them. This organization prevents tangling and ensures that all parts of the filament receive equal exposure to the drying heat, leading to more effective drying results.
Related Post: