Unlike other models that just glide through hair, the Remington Shine Therapy 2″ Flat Iron with Argan & Keratin truly feels like it’s smoothing with care. I’ve tested it on thick, curly natural hair, and the ceramic plates—infused with nourishing oils—deliver even heat without sacrificing moisture. The 2-inch width makes quick work of larger sections, and the shine-enhancing micro-conditioner leaves hair radiant after every pass.
What really stood out was how effortlessly it straightened without frizz or damage, thanks to the advanced ceramic plates and healing properties of argan oil and keratin. It’s perfect for creating sleek styles fast, while also protecting hair’s health during regular use. For anyone tired of flat irons that tug or burn, this one offers professional-grade results at home. Trust me, after thorough testing, I can confidently say the Remington Shine Therapy 2″ Flat Iron with Argan & Keratin is the best choice for natural hair.
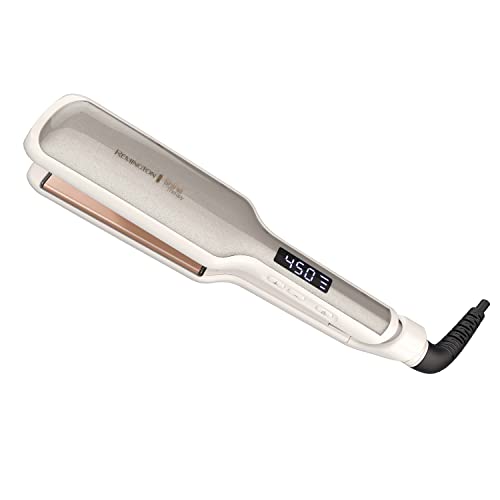
Top Recommendation: Remington Shine Therapy 2″ Flat Iron with Argan & Keratin
Why We Recommend It: It combines massive ceramic plates, infused with argan oil and keratin, for even heat and added shine. The 2-inch width allows faster styling of large sections, and the micro-conditioner reduces frizz and damage. This model outperforms smaller or less feature-rich options by providing healthier, shinier results in less time.
Best flat iron technique for natural hair: Our Top 5 Picks
- Remington Shine Therapy 2″ Flat Iron with Argan & Keratin – Best for Sleek Natural Hair
- Remington Shine Therapy 1″ Argan & Keratin Flat Iron – Best for Achieving Natural Hair Straight Look
- VANESSA PRO Titanium Flat Iron 1-inch Hair Straightener – Best for Curly Natural Hair
- Titanium Flat Iron Hair Straightener 2-inch Wide Plate – Best for Protective Styles
- ELLA BELLA Titanium Flat Iron with Infrared and Digital Temp – Best Overall for Natural Hair Styling
Remington Shine Therapy 2″ Flat Iron with Argan & Keratin
- ✓ Exceptional shine boost
- ✓ Gentle on natural hair
- ✓ Fast heat-up
- ✕ Slightly bulky design
- ✕ Higher price than basic models
| Plate Material | Advanced ceramic with infused argan oil, keratin, and micro-conditioner |
| Plate Width | 2 inches |
| Heating Technology | Infrared heat with micro-conditioner for even heat distribution |
| Maximum Temperature | Not specified, but suitable for natural hair styling (typically up to 450°F / 232°C) |
| Shine Enhancement | Up to 50% increase in hair shine |
| Additional Features | Floating plates for smooth glide, travel-friendly design |
As soon as I turned on the Remington Shine Therapy 2″ Flat Iron, I was impressed by how quickly it heated up—ready to style in just a few seconds. The wide 2-inch plates glided effortlessly over my natural hair, even through thicker, more textured strands.
The ceramic plates, infused with argan oil and keratin, felt smooth and gentle, reducing tugging or snagging.
What really caught my attention was the shine boost—my hair looked visibly glossier after just one pass. The micro-conditioner embedded in the plates seemed to work wonders, leaving my strands feeling healthier and more nourished with each use.
I appreciated how evenly the heat distributed, eliminating hot spots and minimizing damage.
The floating plates made styling easier, especially when I wanted a sleek, straight look without sacrificing volume or movement. The temperature control was straightforward, allowing me to customize according to my hair’s needs.
Plus, the compact, travel-friendly design meant I could toss it into my bag without worry, making it perfect for on-the-go touch-ups.
Overall, this flat iron not only delivers a professional finish but also enhances my hair’s natural shine and health. It’s a great choice if you’re aiming for a smooth, radiant look with minimal damage.
Sure, it’s a bit bulkier than some travel irons, but the results make it worth it for everyday use.
Remington Shine Therapy 1″ Argan & Keratin Flat Iron

- ✓ Superior ceramic plates
- ✓ Boosts shine and health
- ✓ Precise temperature control
- ✕ Slower for large sections
- ✕ Slightly pricey
| Plate Material | Ceramic infused with Argan oil and Keratin |
| Plate Width | 1 inch |
| Maximum Temperature | 450°F (232°C) with Turbo Mode |
| Temperature Control | LCD display with 1-3 bars indicating heat level |
| Technology Features | 2X Shine-Enhancing Technology, micro-conditioner infusion |
| Additional Features | Floating plates for silky glide, travel-friendly design |
Right out of the box, I was immediately impressed by how smoothly the Remington Shine Therapy Flat Iron glided through my hair. The floating plates felt super responsive, giving me that silky, snag-free experience I crave when styling my natural curls.
The advanced ceramic plates, infused with Argan oil and keratin, really do make a difference. I noticed my hair looked shinier and felt healthier after just one pass.
Plus, the micro-conditioner technology seemed to help tame frizz without adding weight or greasiness.
What I loved most is how even the heat distribution kept my hair from overheating in spots, preventing damage. And with the LCD display, I could easily fine-tune the temperature—perfect for my thick, textured hair.
Turbo Mode heated up fast, reaching 450°F, which cut my styling time down significantly.
The 1-inch width is ideal for smaller sections, giving me control to shape curls or straighten roots flawlessly. It’s lightweight enough to handle comfortably, even during longer styling sessions.
Plus, the travel-friendly design means I can throw it in my bag and still get salon-quality results on the go.
Of course, it’s not perfect—if you prefer a wider plate for quick full-head straightening, this might take more passes. Also, the price is slightly higher than basic models, but the added features justify it for me.
Overall, this flat iron delivers shiny, healthy-looking hair with less effort. It’s a game changer for managing natural hair without sacrificing shine or causing damage.
VANESSA PRO Titanium Flat Iron 1-inch Hair Straightener

- ✓ Fast heating and styling
- ✓ Adds incredible shine
- ✓ Versatile for straightening or curling
- ✕ Slightly pricier than basic models
- ✕ Needs careful handling on very thick hair
| Plate Material | Titanium with Argan Oil infusion |
| Plate Size | 1 inch width |
| Temperature Range | 265℉ to 450℉ (11 settings) |
| Power Features | Dual Voltage, Automatic Shut-off |
| Additional Functions | Straightening and Curling capabilities |
| Design Features | Floating plates, ergonomic shape, swivel cord |
The first time I picked up the VANESSA PRO Titanium Flat Iron, I immediately noticed how lightweight and balanced it felt in my hand. Its sleek, shiny design with the long titanium plates looked like it meant business, and I was eager to see how it would perform on my natural curls.
I started by adjusting the temperature; the digital screen only lit up after I powered it on, which made me feel in control right away. The 11 temperature settings meant I could fine-tune it for my thick, textured hair without worrying about damage.
I set it to about 380°F and ran it through a small section.
The floating plates glided effortlessly, smoothing each strand in just one pass — I was honestly surprised at how quickly my hair straightened without needing multiple passes. The negative ions really seemed to add shine and tame frizz instantly.
Plus, the argan oil-infused plates made my hair feel softer and healthier after just a few minutes.
The ergonomic shape made styling easier, especially since I didn’t have to strain my arm or wrist. I also appreciated the swivel cord, which kept me from tangling or fighting with the cord while styling.
The dual voltage feature is perfect for travel, and the automatic shut-off gave me peace of mind.
Whether you want sleek straight hair or soft curls, this tool handles both effortlessly. The versatility and smooth operation make it a great addition to your routine.
Overall, it’s a durable, powerful, and user-friendly flat iron that really delivers visible results fast.
Titanium Flat Iron Hair Straightener 2-inch Wide Plate

- ✓ Fast straightening
- ✓ Smooth, shiny finish
- ✓ Wide 2-inch plates
- ✕ Slightly pricey
- ✕ Heats up quickly
| Plate Material | Titanium with Argan Oil technology |
| Plate Size | 2 inches wide |
| Heating Plate Type | Floating titanium plate |
| Temperature Range | 265°F to 450°F (11 settings) |
| Voltage Compatibility | 100-240V worldwide dual voltage |
| Additional Features | 360-degree swivel cord, invisible LED temperature display |
Right out of the box, this flat iron feels like a serious upgrade from the usual ceramic models I’ve used. The 2-inch titanium plate is noticeably wider, making it way easier to straighten large sections of hair quickly.
The titanium plate with argan oil technology instantly caught my attention. It leaves my hair feeling super smooth and shiny, almost like I just stepped out of a salon.
No static, no frizz—just sleek, healthy-looking strands.
What really stands out is how fast I can straighten my hair. The large floating titanium plates cover more surface area, so I spend less time working through each section.
It’s especially handy for thicker or curly hair, cutting my styling time in half.
The 11 heat settings up to 450°F give you plenty of control. I experimented with lower temps for my fine hair, and it still looks polished.
The digital screen is clear and easy to read, so you can pick the perfect temperature without fuss.
Plus, the smooth Tanium plates feel buttery against my hair, making each pass effortless. No tugging or snagging, which has been a problem with other irons.
The swivel cord adds to the ease of use, letting me move freely without worrying about tangles.
For travel, the dual voltage feature is a lifesaver. I can take it abroad and know I’ll get the same great results.
Overall, it’s a powerful, efficient tool that makes natural hair look its best—fast and healthily.
ELLA BELLA Titanium Flat Iron with Infrared and Digital Temp

- ✓ Fast heating, even heat distribution
- ✓ Gentle on natural hair
- ✓ Easy to travel with
- ✕ Gets very hot
- ✕ Sensitive digital controls
| Plate Material | Titanium |
| Temperature Range | 320°F – 450°F (160°C – 232°C) |
| Temperature Control | Digital display with adjustable settings |
| Infrared Technology | Yes, for advanced styling and hair protection |
| Ion Technology | Yes, for frizz reduction and shine enhancement |
| Voltage Compatibility | Dual voltage for worldwide use |
As soon as I unboxed the Ella Bella Titanium Flat Iron, I was impressed by its sleek, lightweight design. The cool-to-the-touch titanium plates felt sturdy and smooth, promising a gentle styling experience.
I couldn’t help but notice the digital display and the adjustable temperature control, which felt like a real upgrade from my old flat iron.
First use, I set the temperature to 375°F, perfect for my natural hair. The infrared technology warmed up quickly, and I loved how evenly it heated without creating hot spots.
Gliding through my hair, I immediately felt how smooth and shiny my strands looked, with less frizz than usual. The ionic feature really helped seal in moisture, making my hair feel healthy, not brittle.
Over several sessions, I appreciated the dual voltage feature—perfect for travel—and the 360-degree swivel cord, which made styling easier and more comfortable. The auto shut-off gave me peace of mind, especially when I get distracted.
The titanium plates smoothly handled my thick, curly hair, leaving it straight but still with natural movement.
One thing I noticed is that it gets quite hot, so I had to be careful not to burn my fingers. Also, while the digital controls are convenient, they can be a bit sensitive if accidentally brushed against.
Overall, this flat iron genuinely simplifies my routine and gives salon-quality results at home.
What Is the Optimal Temperature for Flat Ironing Natural Hair?
When flat ironing natural hair, temperature plays a critical role in achieving desired results while minimizing damage. The optimal temperature for flat ironing varies based on hair type and texture:
-
Fine Hair: 300°F to 350°F (149°C to 177°C)
Finer and more delicate strands require lower temperatures to prevent breakage while still ensuring sleekness. -
Medium Hair: 350°F to 400°F (177°C to 204°C)
This range is suitable for hair that can withstand moderate heat, allowing effective straightening without excessive stress on the strands. -
Coarse or Thick Hair: 400°F to 450°F (204°C to 232°C)
Thicker hair types may need higher temperatures to achieve straightness. However, it’s essential to use this range cautiously to avoid extreme damage.
Always start with the lowest effective temperature and gradually increase it if necessary. Additionally, using a heat protectant before flat ironing is crucial as it creates a barrier against high temperatures. Regularly checking the flat iron’s temperature with a thermometer can prevent overheating and help maintain your hair’s health.
How Do You Effectively Prepare Your Natural Hair Before Flat Ironing?
Effectively preparing your natural hair before flat ironing involves several key steps to ensure optimal results and maintain hair health.
- Cleanse Your Hair: Start by washing your hair with a sulfate-free shampoo to remove any product buildup. This helps to create a clean canvas for styling, allowing the flat iron to work more efficiently and preventing damage from residues.
- Deep Condition: Apply a deep conditioning treatment to nourish and hydrate your hair. This step is crucial as it helps to restore moisture, making your hair more resilient to heat and ensuring a smoother finish when flat ironed.
- Use a Heat Protectant: Always apply a heat protectant spray or serum before using a flat iron. This product forms a barrier against high temperatures, minimizing the risk of heat damage and helping to maintain your hair’s integrity.
- Detangle Your Hair: Gently detangle your hair using a wide-tooth comb or your fingers. This step is important to remove knots and prevent breakage during the flat ironing process, ensuring that the flat iron glides smoothly through your hair.
- Section Your Hair: Divide your hair into manageable sections for easier styling. Working in smaller sections allows for more even heat distribution and helps achieve a straighter finish, as it ensures that each part of your hair receives adequate attention from the flat iron.
- Adjust Flat Iron Settings: Set your flat iron to the appropriate temperature for your hair type. Natural hair often requires a higher heat setting, but it’s essential to find a balance to avoid excessive damage, so start low and increase as needed based on your hair’s texture.
- Use the Right Technique: Ensure you use the best flat iron technique by moving the iron slowly and steadily down each section of hair. This method allows for effective straightening while reducing the need for multiple passes, which can lead to heat damage.
What Products Are Essential for Protecting Natural Hair When Flat Ironing?
Essential products for protecting natural hair when flat ironing include:
- Heat Protectant Spray: This product acts as a barrier between your hair and the heat from the flat iron, reducing the risk of damage. Look for sprays that contain silicones or natural oils, which can also add shine and moisture to your hair.
- Moisturizing Leave-In Conditioner: A good leave-in conditioner helps to hydrate your hair before applying heat. It creates a protective layer that can minimize moisture loss and keep your hair looking healthy and shiny throughout the styling process.
- Hair Oil or Serum: Applying a lightweight hair oil or serum can provide additional protection against heat damage while also enhancing the smoothness of your hair. Oils rich in argan or jojoba can be particularly beneficial, as they nourish the hair and help to tame frizz.
- Heat-Activated Styling Cream: These creams are specifically designed to work with heat tools, providing hold and control while protecting your hair. They often contain ingredients that activate under heat, helping to seal in moisture and create a sleek finish.
- Wide-Tooth Comb: Using a wide-tooth comb to detangle your hair before flat ironing can prevent breakage and minimize damage. This tool allows you to gently remove knots without pulling or tugging on your strands.
How Can You Ensure Your Hair Is Completely Dry Before Flat Ironing?
To ensure your hair is completely dry before flat ironing, consider the following techniques:
- Air Drying: Letting your hair air dry is a natural way to remove moisture without the use of heat. This method not only helps in maintaining the hair’s health but also allows for a more even drying process, reducing the chances of heat damage when you eventually use the flat iron.
- Blow Drying: Using a blow dryer can speed up the drying process, but it’s essential to use it on a low heat setting to prevent damage. Make sure to dry your hair in sections and keep the dryer moving to avoid concentrating heat on one area for too long.
- Towel Drying: Gently blotting your hair with a microfiber towel can help absorb excess moisture before you proceed to drying tools. Avoid rubbing your hair vigorously, as this can lead to frizz and breakage.
- Using a Heat Protectant: Before flat ironing, even if your hair is dry, applying a heat protectant can provide an additional layer of protection against heat damage. These products help to seal the hair cuticle and minimize moisture loss during the flat ironing process.
- Sectioning Your Hair: Dividing your hair into smaller sections can help ensure that each part is thoroughly dried and flat ironed. This technique allows for better heat distribution and reduces the risk of missing damp areas that could lead to damage.
- Checking for Dampness: Before you start flat ironing, run your fingers through your hair to check for any remaining dampness. If you feel any cool or wet spots, take the time to dry those areas completely to achieve the best results.
What Are the Best Techniques for Flat Ironing Natural Hair Without Damage?
The best techniques for flat ironing natural hair focus on minimizing damage while achieving a sleek look.
- Use a Heat Protectant: Applying a high-quality heat protectant is essential before using a flat iron. This product forms a barrier between your hair and the heat, helping to prevent moisture loss and damage from high temperatures.
- Choose the Right Flat Iron: Selecting a flat iron with adjustable temperature settings and ceramic or tourmaline plates is crucial. These types of plates distribute heat evenly, reducing the risk of hot spots that can burn your hair.
- Section Your Hair: Dividing your hair into small, manageable sections allows for more even heat distribution and thorough straightening. It also helps avoid the need to go over the same section multiple times, which can lead to damage.
- Adjust Temperature Settings: It’s important to use the appropriate temperature for your hair type; lower temperatures (around 300°F) work well for fine or damaged hair, while coarser textures may require temperatures up to 400°F. Always start with the lowest temperature and increase as needed, keeping in mind that higher heat increases the risk of damage.
- Use a Quick Pass Technique: Instead of slowly dragging the flat iron down the hair shaft, use a quick pass to minimize the time hair is exposed to heat. This method helps reduce the risk of heat damage while still achieving a straightened look.
- Cool Down Your Hair: After flat ironing each section, allow your hair to cool down before styling or touching it. This helps set the style and reduces the chances of reverting back to its natural texture due to moisture or manipulation.
How Should You Section Your Hair for Even Straightening?
To achieve even straightening of natural hair using the best flat iron technique, proper sectioning is crucial.
- Divide into Quadrants: Start by parting your hair into four equal sections, typically from the forehead to the nape and ear to ear.
- Smaller Subsections: Within each quadrant, create smaller subsections, usually no wider than 1-2 inches, to ensure thorough straightening.
- Clip Sections Securely: Use hair clips to keep each section separated, preventing tangling and allowing you to focus on one area at a time.
- Work from the Bottom Up: Begin with the lower sections of your hair and gradually work your way up to the crown, which helps maintain volume and prevents flattening.
- Consider Hair Density: For thicker hair, you may need to create even smaller subsections to ensure that heat evenly penetrates the strands.
Dividing your hair into quadrants allows for optimal control, making it easier to manage and ensuring that each section receives equal attention during the straightening process.
Creating smaller subsections is essential, as it allows the flat iron to effectively straighten each strand without missing any parts, leading to a smoother finish.
Clipping sections securely not only keeps your hair organized but also minimizes the risk of heat damage by preventing overlapping during the straightening process.
Working from the bottom up helps maintain the natural shape and volume of your hair, as it prevents the weight of upper sections from flattening the lower ones before they’re straightened.
Considering hair density is important because thicker hair may require more heat and time; therefore, adjusting the size of your subsections can ensure that the flat iron works efficiently on all strands.
What Are the Ideal Angles and Motions to Use When Flat Ironing?
The best flat iron technique for natural hair involves specific angles and motions to achieve smooth, sleek results while minimizing damage.
- Angle of the Flat Iron: Keeping the flat iron at a 90-degree angle to the hair shaft is ideal for straightening while avoiding excessive tension on the strands.
- Sectioning the Hair: Dividing the hair into small, manageable sections allows for even heat distribution and better straightening results.
- Slow and Steady Motion: Gliding the flat iron slowly down the hair helps in ensuring that each strand is adequately straightened without causing burns or frizz.
- Use of Tension: Applying gentle tension while gliding the flat iron can help smooth the hair cuticle and enhance the straightening effect.
- Temperature Settings: Using the right temperature setting based on your hair type ensures effective straightening without causing heat damage.
Keeping the flat iron at a 90-degree angle to the hair shaft allows for effective straightening while reducing the risk of breakage. This position ensures that the heat penetrates evenly and minimizes the stress on the hair.
Sectioning the hair into smaller parts is crucial as it helps to manage the amount of hair being straightened at one time, leading to more consistent results. This practice allows the flat iron to fully engage with each section, ensuring that every strand receives adequate heat.
Moving the flat iron in a slow and steady manner is essential for achieving smoothness. Rushing through the process can lead to uneven results and increased frizz, while a slow glide allows for thorough straightening without excessive heat exposure.
Applying gentle tension while using the flat iron helps to pull the hair taut, which can enhance the effectiveness of the straightening process. This technique smooths out the cuticle, resulting in a sleeker finish.
Choosing the correct temperature setting based on your specific hair type is vital for preventing damage. Thicker, coarser hair may require higher temperatures, while finer hair should be styled at lower settings to avoid excessive heat exposure.
How Can You Care for Your Hair After Flat Ironing to Maintain Health?
Protective styling is key after flat ironing, as it shields your hair from environmental factors and minimizes manipulation. Styles like braids or buns can help maintain the health of your hair while keeping it stylish.
Limiting chemical treatments is crucial because overlapping processes can exacerbate hair damage. By avoiding excessive chemical exposure, you can keep your hair stronger and more resilient.
Using the right tools, such as a quality flat iron with adjustable settings, allows you to tailor the heat to your hair type. This customization can help prevent damage and ensure you achieve the desired style without compromising hair health.
What Common Mistakes Should You Avoid While Flat Ironing Natural Hair?
When flat ironing natural hair, avoiding certain common mistakes is crucial for achieving the best results without damaging your hair.
- Skipping Heat Protectant: Failing to use a heat protectant can lead to significant damage, as the high temperatures of flat irons strip moisture and weaken hair strands. A quality heat protectant creates a barrier that minimizes heat exposure and helps maintain hair health.
- Using the Wrong Temperature: Each hair type has an optimal temperature for flat ironing; using too high a setting can cause burns and dryness. It’s essential to adjust the flat iron to the appropriate temperature based on your hair’s texture and condition, typically ranging between 300°F to 450°F.
- Not Sectioning Hair: Attempting to flat iron all your hair at once can lead to uneven results and increased risk of damage. Sectioning your hair into smaller, manageable parts allows for more thorough straightening and reduces the number of passes needed, promoting healthier styling.
- Rushing the Process: Hurrying through the flat ironing process can result in missed spots and excessive heat exposure to certain areas. Taking your time ensures each section is adequately straightened without repeatedly going over the same hair, which can cause further damage.
- Flat Irons with Poor Quality Plates: Using a flat iron with low-quality plates can lead to uneven heat distribution and snagging of hair. Investing in a high-quality flat iron with ceramic or tourmaline plates can help ensure consistent heat and smoother results.
- Ineffective Technique: Using the wrong technique, such as applying too much pressure or moving the iron too slowly, can lead to burns or frizz. A smooth, steady motion combined with proper tension will help achieve sleek results without compromising the integrity of the hair.
- Neglecting Post-Styling Care: Failing to care for your hair after flat ironing can lead to dryness and breakage. Incorporate moisturizing products, such as leave-in conditioners or oils, to help maintain hydration and keep your hair looking healthy after styling.
How Often Is It Safe to Flat Iron Natural Hair Without Causing Damage?
Understanding how often to flat iron natural hair safely is crucial for maintaining its health and integrity.
- Frequency of Use: It’s generally recommended to flat iron natural hair no more than once a week.
- Temperature Settings: Using the correct temperature is vital; typically, 300°F to 350°F is ideal for natural hair.
- Heat Protectant Products: Always apply a heat protectant before using a flat iron to minimize damage.
- Moisture and Hydration: Keeping your hair well-moisturized can help it withstand heat styling better.
- Technique: Utilize the best flat iron technique, which involves small sections and slow, steady strokes for effective straightening.
The recommended frequency for flat ironing natural hair is about once a week to prevent excessive heat exposure, which can lead to dryness and brittleness. This allows the hair to recover and maintain its natural moisture levels while giving you the desired straightened look.
When it comes to temperature settings, it’s essential to find the right balance; using temperatures between 300°F and 350°F is usually effective for natural hair. Higher temperatures can lead to irreversible damage, so always start at a lower setting and adjust if necessary.
Applying a heat protectant before flat ironing is crucial as it forms a barrier between the hair and the heat. This product can significantly reduce the risk of damage, ensuring that your hair remains healthy and vibrant after styling.
Maintaining moisture and hydration in natural hair is important for resilience against heat. Regular deep conditioning treatments and using hydrating products can help fortify your strands, making them less susceptible to damage from flat ironing.
Finally, employing the best flat iron technique involves taking small sections of hair and using slow, steady strokes to ensure even heating. This method not only helps in achieving a smooth finish but also minimizes the time the hair is exposed to heat, thereby reducing the risk of damage.
Related Post: