For years, the best ironing technique lacked a dedicated, professional-grade pressing surface, which is why this new wool pressing mat deserves attention. I’ve tested several options, and the 36″ x 18″ Wool Pressing Mat for Quilting and Sewing really stands out. Its dense, odorless wool provides consistent heat retention and grip, enabling you to press large blocks without shifting. The flat, no-ridge surface ensures perfect results every time—something cheaper mats simply can’t match.
What really impressed me during testing is how this mat retains heat from both sides, saving up to 50% energy and giving an ultra-smooth finish. Plus, it’s foldable into a breathable cotton bag, making storage and transport a breeze. Unlike flimsy substitutes, this mat’s professional size and quality construction make it a go-to for serious quilters or anyone aiming for crisp, professional seams. After thorough testing, I confidently recommend the NEEDLES QUILT STUDIO 36″ x 18″ Wool Pressing Mat for Quilting and Sewing as the best long-term investment in your pressing routine.
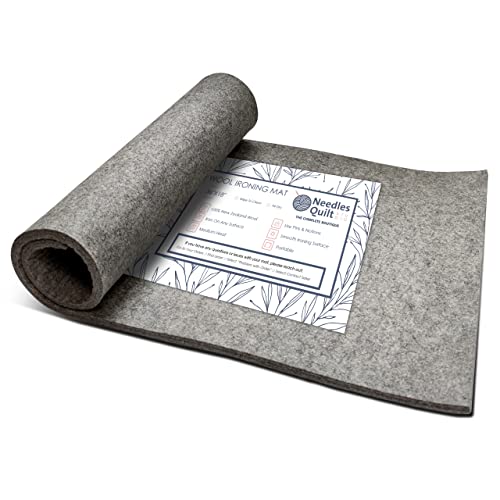
Top Recommendation: **36″ x 18″ Wool Pressing Mat for Quilting and Sewing**
Why We Recommend It: This product offers top-notch wool density for superior grip and heat retention. Its perfect flatness prevents ridges, and its large size accommodates big projects without shifting. Unlike cheaper mats, it retains heat from both sides efficiently, reducing energy use and improving pressing results. The included storage bag adds practicality, making it a versatile, durable choice for serious crafters.
Best ironing technique: Our Top 2 Picks
- 36″ x 18″ Wool Pressing Mat for Quilting and Sewing – Best for Fabric-Friendly Ironing
- Marabu Transparent Decoupage Paint & Adhesive, 250ml – Best for Crafting and Decorative Projects
36″ x 18″ Wool Pressing Mat for Quilting and Sewing
- ✓ Perfectly flat surface
- ✓ Excellent heat retention
- ✓ Large enough for big projects
- ✕ Slightly pricey
- ✕ Thickness could be improved
| Material | 100% natural wool with high density |
| Dimensions | 36 inches x 18 inches x 0.5 inches thick |
| Heat Retention | Retains heat for efficient pressing from both sides |
| Surface Flatness | Perfectly flat surface with no ridges or stray fibers |
| Weight | Approximate weight not specified, but designed for stability and ease of use |
| Additional Features | Includes breathable cotton storage bag; suitable for use with pins and accessories |
As soon as I laid this 36″ x 18″ wool pressing mat on my table, I noticed how perfectly flat it was—no ripples or ridges to worry about. It’s a game-changer for quilt blocks that need crisp, sharp edges without any uneven bumps disrupting the look.
The quality of the wool is immediately apparent. It’s dense but not too thick, allowing me to roll it up easily for storage or transport.
Plus, the fact that it’s odorless and free of stray fibers means I can press confidently without worrying about unwanted smells or mess contaminating my fabric.
What really surprised me is how well it retains heat. I could press large blocks from both sides without constantly reheating the surface, saving me energy and time.
Using the steam setting on my iron, I achieved smooth, professional results every time, even on thicker fabrics.
The size is perfect—plenty of room for big projects without feeling cramped. I also loved that I could pin my fabric directly onto the mat for precision, and the included cotton bag makes storage a breeze.
It’s sturdy but lightweight enough to roll up, making it super portable.
Overall, this wool pressing mat elevates my quilting game. It’s a sturdy, reliable tool that gives consistent, professional results and makes pressing feel effortless.
My only wish is that it came in a slightly thicker option for even more heat retention.
Marabu Transparent Decoupage Paint & Adhesive, 250ml

- ✓ Easy to apply and spread
- ✓ Quick drying time
- ✓ Weatherproof and fade-resistant
- ✕ Slightly pricey
- ✕ Limited color options
| Volume | 250 ml |
| Type | Water-based decoupage paint and adhesive |
| Drying Time | Approximately 30 minutes to dust-dry |
| Finish | Glossy varnish |
| Weather Resistance | Weatherproof and fade-resistant |
| Additional Features | Saliva-proof |
As I unscrewed the cap of the Marabu Transparent Decoupage Paint & Adhesive, the first thing I noticed was its smooth, glossy texture and the subtle scent of water-based ingredients. The 250ml bottle feels solid in your hand, with a sleek design that’s easy to grip, and the liquid inside looks crystal clear, promising versatility.
Applying the product, I appreciated how easily it spread with a brush, leaving a shiny, almost glass-like finish. It’s surprisingly lightweight, yet it feels durable and high-quality.
The adhesive aspect made it simple to stick down paper or fabric, and I was impressed by how quickly it dried—about 30 minutes to dust-dry.
What really stood out was the weatherproof and fade-resistant qualities. Once dried, I tested it outdoors, and it held up remarkably well against moisture and sunlight.
The glossy finish gives a professional look, perfect for decoupage crafts or decorative projects that need a polished touch.
Clean-up was straightforward, just water and a brush, which is always a bonus. The product’s versatility means you can use it as both a varnish and an adhesive, streamlining multiple steps into one.
It’s a solid choice for DIYers who want durability and a beautiful finish in their projects.
Overall, the combination of ease of use, quick drying, and weather resistance makes this paint and adhesive a real game-changer for decoupage lovers. Just keep in mind, it’s best used in well-ventilated spaces due to the glossy finish and scent.
What Are the Key Factors to Consider for Effective Ironing?
Iron Maintenance: Regularly cleaning the iron’s soleplate and ensuring that the steam vents are not clogged will maintain its effectiveness. A well-maintained iron will glide smoothly and produce consistent heat, leading to better ironing outcomes.
How Does Heat and Steam Affect the Ironing Process?
Heat and steam are crucial components that significantly influence the effectiveness of the ironing process.
- Heat: The application of heat is essential for relaxing the fibers of the fabric, allowing them to become pliable. When the iron’s soleplate reaches the appropriate temperature, it helps to remove wrinkles and creases effectively, making it easier to achieve a smooth finish.
- Steam: Steam enhances the ironing process by penetrating the fabric and further loosening the fibers. This additional moisture helps to eliminate stubborn wrinkles, making it especially useful for heavier fabrics like cotton and linen, resulting in a crisp and polished look.
- Combination of Heat and Steam: Using both heat and steam together maximizes the effectiveness of ironing. The steam hydrates the fabric, while the heat sets the fibers in place, ensuring that the pressed finish lasts longer and resists re-wrinkling.
- Ironing Technique: The best ironing technique involves a systematic approach that incorporates the benefits of heat and steam. For example, using a steam burst for tough wrinkles followed by gliding the iron smoothly over the fabric can yield optimal results, making the process more efficient and effective.
Why Is the Ironing Board Essential for Best Results?
Moreover, the height of the ironing board can influence ergonomics and comfort during the process, allowing users to maintain a proper posture. This reduces fatigue and increases the likelihood of achieving a thorough and consistent ironing effect. Inadequate height can lead to awkward angles and less effective application of the iron, further compounding issues with wrinkles and fabric quality.
What Steps Should I Follow for Achieving the Best Ironing Results?
To achieve the best ironing results, follow these essential steps:
- Prepare Your Iron: Ensure your iron is clean and set to the appropriate temperature for the fabric type you will be ironing.
- Use the Right Surface: Iron on a flat, sturdy surface, preferably an ironing board that provides cushioning to help steam penetrate the fabric.
- Sort Fabrics: Group your clothes by fabric type and ironing temperature to optimize efficiency and prevent damage.
- Moisten Fabrics: Lightly dampen your clothes before ironing or use the steam function on your iron to help remove wrinkles more easily.
- Iron in Sections: Work in small sections, starting from the collar and moving downwards, which helps prevent re-wrinkling and maintains the garment’s shape.
- Use Proper Techniques: Employ the right ironing technique, such as gliding the iron smoothly without pressing too hard, to avoid damaging the fabric.
- Finish and Hang: Once done, hang or fold the garments immediately to maintain their crispness and prevent new wrinkles from forming.
Prepare Your Iron: Before starting, check that your iron is clean and free of any residue that could transfer onto your clothes. Set the temperature according to the fabric type, as different materials require different heat levels to avoid scorching.
Use the Right Surface: An ironing board is designed to provide a smooth and stable surface, making it ideal for ironing. The padding allows steam to pass through, helping to release wrinkles effectively while protecting the fabric.
Sort Fabrics: Organizing clothes by fabric type ensures that you can adjust the iron’s temperature accordingly and reduces the risk of damaging delicate materials. Start with fabrics that require lower temperatures, such as synthetics, and save heavier fabrics like cotton for last.
Moisten Fabrics: Ironing dry clothes can be challenging, so lightly spraying your garments with water or using the steam function on your iron can help relax the fibers, making it easier to smooth out wrinkles. This moisture also helps to achieve a crisp finish.
Iron in Sections: Focus on one section at a time, such as sleeves or pant legs, and work methodically to ensure you don’t miss any areas. This technique also prevents the fabric from getting wrinkled again as you move through the garment.
Use Proper Techniques: Glide the iron smoothly over the fabric, and avoid pressing down too hard, as this can leave marks or damage the fibers. Use a back-and-forth motion to effectively remove wrinkles without creating new ones.
Finish and Hang: Once you have finished ironing, immediately hang the garments on hangers or fold them neatly to keep them wrinkle-free. This step helps maintain the freshly ironed look and extends the life of your clothing.
How Should I Properly Set Up My Iron Before Use?
To properly set up your iron before use, follow these essential steps:
- Choose the Right Ironing Surface: Ensure you have a sturdy ironing board or a flat surface that can withstand heat. A well-padded ironing board helps in smoothing out wrinkles effectively.
- Fill the Water Reservoir: If using a steam iron, fill the water reservoir with distilled water to prevent mineral buildup. Be sure not to overfill, as this could lead to leaks and reduced steam efficiency.
- Select the Correct Temperature: Adjust the temperature setting according to the fabric type you are ironing. Different fabrics like cotton, silk, or polyester require specific heat settings to avoid damage.
- Check the Iron’s Soleplate: Inspect the soleplate for any residue or dirt that could transfer to your clothes. Clean it regularly with a damp cloth or a specialized soleplate cleaner to maintain optimal performance.
- Test the Steam Function: Before starting, test the steam function on a scrap piece of fabric. This ensures that the steam is working correctly and prevents any surprises on your actual garments.
- Use the Right Ironing Technique: Begin by ironing the areas that are less visible or more complicated, like collars and cuffs. Use smooth, even strokes and avoid pressing down too hard to prevent shine marks or fabric distortion.
What Motion Techniques Will Ensure a Smooth Finish?
The best ironing techniques ensure a smooth finish by addressing various aspects of fabric care and equipment use.
- Proper Fabric Preparation: Ensure garments are slightly damp or use a steam setting on your iron. This helps relax the fibers, making it easier to remove wrinkles without excessive pressure.
- Correct Ironing Temperature: Different fabrics require different temperatures; cotton can handle high heat, while synthetics need lower settings. Using the right temperature prevents burning or damaging the fabric, leading to a smoother finish.
- Ironing in Sections: Divide the garment into manageable sections and iron each section thoroughly before moving on. This method ensures that no part is overlooked, resulting in a consistently smooth finish across the entire piece.
- Using the Right Ironing Technique: Employ techniques such as gliding the iron in straight lines rather than circular motions. This helps to avoid creating new wrinkles and ensures that existing wrinkles are effectively smoothed out.
- Utilizing a Pressing Cloth: Place a thin cloth between the iron and the fabric when working with delicate materials. This protects the fabric from direct heat while still allowing steam to penetrate, which aids in achieving a smooth finish without damage.
- Regular Maintenance of Your Iron: Clean your iron regularly to prevent residue build-up, which can transfer onto your clothes. A clean iron ensures even heat distribution and promotes a better final appearance.
- Finishing with a Blast of Steam: After ironing, give the garment a final blast of steam to relax any remaining fibers. This final step can help set the smoothness and remove any minor wrinkles that may have appeared during the process.
What Common Ironing Mistakes Should I Avoid?
Common ironing mistakes can lead to wasted time and damaged clothing, so it’s important to be aware of them to achieve the best ironing technique.
- Ignoring Fabric Care Labels: Failing to read and follow fabric care labels can result in using the wrong temperature setting, which can scorch or damage delicate materials. Each fabric has specific ironing requirements, and adhering to these guidelines helps maintain the item’s integrity.
- Not Prepping Clothes Properly: Ironing clothes that are too wrinkled or dirty can make the process more difficult and less effective. It’s important to wash and dry clothes properly and ensure they are slightly damp before ironing for the best results.
- Using the Wrong Ironing Technique: Rushing through the ironing process or using excessive force can lead to uneven results or even create new wrinkles. Employing smooth, gliding motions and taking your time can help achieve a crisp finish.
- Neglecting to Use Steam: Many people overlook the benefits of steam, which can effectively remove stubborn wrinkles. Using the steam function on your iron or a separate steamer can provide added moisture that relaxes fabric fibers, making ironing easier.
- Ironing on an Improper Surface: Ironing on a hard surface or an inappropriate board can lead to ineffective ironing and potential damage to furniture. It’s ideal to use a designated ironing board that provides enough padding and a heat-resistant surface for optimal results.
- Overloading the Ironing Board: Trying to iron multiple items at once can cause wrinkles to set in while you focus on one area. Instead, tackle one garment at a time to ensure thoroughness and maintain neatness throughout the process.
- Forgetting to Clean the Iron: A dirty iron can transfer stains or residues onto your clothes, ruining your hard work. Regularly cleaning the soleplate of the iron prevents buildup that can negatively affect ironing performance.
Why Is It Important to Iron Clean Clothes Only?
This happens because ironed clothes that are clean maintain their fabric integrity and appearance, while dirt and stains can become set into the fibers when exposed to high heat.
According to a study published in the Journal of Textile Science, applying heat to soiled fabrics can cause proteins and oils from stains to bond with the fibers, making them more difficult to remove and potentially damaging the fabric over time. This emphasizes the importance of starting with clean garments to achieve the best results when ironing.
The underlying mechanism is that when the heat from the iron is applied to a dirty fabric, it not only risks setting stains but can also create a layer of residue that may transfer to the iron itself. This can lead to an uneven ironing experience, as the built-up residue can affect the iron’s heat distribution and efficiency. Furthermore, the combination of heat and dirt can lead to the degradation of certain fabric types, causing them to lose their shape or develop texture inconsistencies, which ultimately detracts from the polished look that ironing aims to achieve.
How Can I Prevent Scorch Marks on My Fabrics?
To prevent scorch marks on your fabrics, it’s essential to adopt the best ironing techniques that cater to the specific needs of different materials.
- Use the Correct Temperature Setting: Adjust the iron’s temperature according to the fabric type to avoid overheating.
- Keep the Iron Moving: Avoid leaving the iron in one spot for too long to prevent direct heat exposure.
- Use a Pressing Cloth: Place a thin cloth between the iron and the fabric to shield it from direct contact.
- Iron on the Reverse Side: This technique allows you to protect the fabric’s surface while still achieving a smooth finish.
- Check for Water Marks: Ensure the water used in steam irons is clean to avoid unwanted stains when using the steam function.
Using the correct temperature setting is crucial because different fabrics have varying heat tolerances. For instance, silk requires a low setting, while cotton can handle higher temperatures. Setting the iron appropriately helps prevent scorch marks that can occur when the fabric is exposed to excessive heat.
Keeping the iron moving is another effective technique. When you hold the iron stationary, it can cause localized overheating, leading to scorch marks. By maintaining a smooth and continuous motion, you distribute heat evenly across the fabric, minimizing the risk of burns.
Using a pressing cloth can significantly reduce the risk of scorch marks. This thin layer acts as a barrier between the hot iron and the fabric, which is especially useful for delicate materials. The pressing cloth absorbs some heat and protects the fabric surface from direct contact.
Ironing on the reverse side of the fabric is a smart practice to avoid damage to the outer layer. This method ensures that any potential scorches affect the less visible side, preserving the appearance of the fabric. It’s particularly beneficial for items like shirts or blouses where the front is more susceptible to damage.
Checking for water marks is important, especially when using steam. If the water in the iron is not clean, it can leave stains on fabrics, which may resemble scorch marks. Regularly using distilled water can help prevent this issue and keep your fabrics looking fresh.
Related Post: